


Choosing Wood
As mentioned on the Lumber and Foam page, there are many kinds of wood products you can use in a model railroad. This page will focus on two of them: dimensional lumber (boards and beams) and plywood (sheets).
Safety
Working with wood involves power tools: saws, drills, and sanders. As with any power tool, working carefully and with attention to what’s behind the piece you are working on is very important. You don’t want to saw through a workbench, or hit a metal clamp and break your sawblade. And you certainly don’t want to saw through or drill into your fingers.
You also don’t want the wood to move unexpectedly when you’re working on it. If cutting or drilling, make sure the wood is held in place securely so it can’t suddenly slide sideways or spin. C-clamps or other woodworking clamps (which are less likely to leave dents in the wood than C-clamps) are very important tools to have and use.
Even handling wood can be dangerous, in that the edges tend to splinter. And splinters aren’t only painful, they can lead to infection. Before antibiotics, splinters killed people. Today they can still lead to an expensive doctor’s visit. Wear good heavy-leather gloves or specialty gloves sold for carpenter’s use, which have protective pads on the palm and inside of the fingers, and heavy cloth backing. And wear these when selecting your lumber and loading and unloading it. I’ve picked up more splinters at lumber yards, where I didn’t think to take precautions, than in doing the actual construction. Long-sleeved shirts of heavy cloth are also a good idea (more experience speaking there!).
Things Not to Use
Wood is used where you need structural strength in a material that’s relatively easy to cut to shape and attach things to. Wood is strong because it has long and interconnected fibers from when it was a growing tree. These can flex, but don’t easily break or pull apart.
Materials that don’t work well as structural material, although they may be appropriate for other uses, are composite materials where individual solids are held in some kind of matrix. Materials such as hardboard, MDF (medium density fiberboard) and OSB (oriented strand board) are useful for many things, but not in structural roles requiring them to self-support over the long term. They *will* deform over time and they lack the strength that real wood gains from the strands present in the original plant material.
Wood Grades and Other Characteristics
Wood is sold for a variety of uses, and identified with various gradings to help builders select an appropriate kind for their purpose. Wood may also be characterized as being intended for a specific use (this is more common with plywood), and this means that the manufacturer chose the material (or assembled it in the case of plywood) with thought given to making it the best solution for one specific use. Using wood intended for one use in another is often fine for the kinds of work we do, but can lead to unnecessary expense (e.g., using “select” pine for structural beams isn’t wrong, it just costs more).
Dimensional Lumber
For dimensional lumber, there are several specialty grades for hardwood and softwood describing wood suitable for use where the natural wood will be visible. These avoid knots (cross-sections of branches from the original tree), and changes of grain. Terms such as FAS or F1F for hardwood refer to the highest grades (F1F is FAS on one side only). The term “select” is used for grades, sometimes more than one, below this and is typically the highest grade of softwood. If “select” is subdivided, “C select” is better than “D select”. Finally “common” or a number grade (or both, e.g., “#1 common”) is used for lesser grades, with “1” being better than “2”). Common grades generally have substantial knots, whereas select will have fewer and smaller ones.
Knots are problematic in construction: you don’t want to drive screws or nails into one, or cut the board through one, as they can separate from the rest of the board later. But since you aren’t normally looking at lumber on a layout (it’s either hidden or painted), you can often use the lowest grade available and just choose pieces to avoid knots where they would cause a problem.
Moisture content is separate from grades, and refers to the amount of water left in the wood when manufactured. Woods with more water are more prone to warping later as they dry. This is one place where “green” is not a positive term: green wood is wet wood, with a moisture content above 19%. Green wood may be stamped “S-GRN”. Most good wood is kiln-dried to 19% or less and may be stamped “KD” or “S-DRY” along with other markings for species of tree, manufacturer, and grade.
Lumber thicker than 2” (5 cm before drying) is often air-dried rather than kiln dried, and should be considered “green”. Lumber that heavy isn’t normally used on a model railroad though.
Note in particular that grades don’t refer to the wood’s tendency to warp, but to its appearance and in particular to the number and size of knots, which may affect how much gets wasted when cutting to avoid them.
Plywood Structure
A sheet of plywood consists of two outer veneer faces, which are often different materials and qualities, a “core” which may be one or more veneers or some other material, and a glue uses to bond the layers together.
Plywood is held together by glue, and normally that glue is not waterproof. A little water, as in creating scenery or ballasting, isn’t likely to affect it, but plywood that’s going to be exposed to water for an extended period needs a special glue. This shouldn’t be an issue for model railroad use, but in case you’re curious there are basically four levels:
- “interior” plywood should not be stored or used in wet or humid locations.
- “exposure 2” plywood is for interior use where there may be brief exposure to weather during construction.
- “exposure 1” plywood is for high humidity use and brief exposure to weather during construction.
- “exterior” plywood is for long-term exposure to weather,
Note that plywood used outdoors is still expected to be protected from the weather (by paint or other materials). The various exterior-use glues are more intended to deal with moisture from humidity than direct exposure to water. There is specialty Marine plywood, made from tropical hardwoods, for use in water.
As it cures over time the glue in plywood (particularly interior plywood) emits formaldehyde, a known carcinogen at high concentrations. Newer low-emission plywood (the best is marked “E0”) uses glues formulated to reduce this. I haven’t seen this in my local stores yet, and it may be more of an issue in cabinet construction than most structural plywood (which uses various non-interior glues).
Plywood is normally made with interior layers that are also wood veneers, although often of a lower quality than the exterior ones. Having more, thinner, layers is generally a good thing, as it minimizes the effect of flaws in an individual layer and provides more resistance to warping.
Plywood can be made with a non-veneer core, e.g., an “MDF core” (see the description of MDF above). This is normally sold for cabinet or furniture construction, as the edges look better than normal plywood and are easier to screw into. Avoid this for any structural application (i.e., most model railroad uses). This should be clearly marked. Normally the cores are similar “veneer” sheets to the faces, sometimes called a “veneer core”, although this isn’t typically mentioned since it’s the normal kind. If you do use MDF-core plywood, specialty screws may be required (although it sounds like these are similar in nature to drywall screws).
Plywood Grades
Plywood comes in both softwood and hardwood forms. Normally softwood is used in model railroading applications, although some hardwoods may be used for exposed table tops or similar furniture-like applications.
Plywood is formed from thin layers, called veneers, of wood cut from a tree (much like peeling an apple) and then glued together. Each layer of plywood can have the same kinds of flaws as dimensional lumber does. However only on one or both of the outside veneers (the “faces”) does appearance matter. Plywood will have more knots than dimensional lumber, simply because it’s cut from around the tree, and most trees have at least a few branches on any given length. Two new problems that come with plywood are patches where knots were removed and replaced with other wood, and “voids” where knots were remove and not replaced. Voids are common on lower grades of plywood, because they have minimal affect on its structural quality and would cost more to patch. Plywood can also have “splits”, where one veneer is cracked, usually for a short distance.
The layers in plywood have their grain running in different directions, to increase the strength. This means that even if you cut along the grain on one face, to reduce splintering, you are still cutting across interior grains and possibly the grain on the other face. This is one reason plywood is more prone to splintering when cut. The thin veneer layers are another.
Plywood has a number of different descriptive terms depending on a number of characteristics. The most important designates the grade of the two outer layers (the “faces”). According to Wikipedia grading systems vary by country, but most follow either U.S. or British standards that use a letter-grade system where the two faces are described individually.
For softwood plywood, grade is ranked from “A” to “D”. Grades A and B are best for visible uses, and have a minimum of knots that will be visible when lightly painted, or gaps where knots are missing (called “voids”) that would create an irregular surface. Grades C and D are for non-visible or structural uses. Grade “A” is considered “cabinet” or “furniture” grade, and is normally only found on specialty plywoods intended for such use. Hardwood plywood can also come in grade “E”. Normally softwood plywood has both faces graded with a letter grade, so “BC” would be a moderately good level used where the wood is intended to be visible, but not perfect, while CD is a typical construction grade where the wood is hidden (e.g., under flooring material in a house).
For hardwood, one side is designated the front and graded alphabetically, while the other, the back, is graded numerically, with 1 & 2 similar to A but referring only to knots and voids, and not other visible characteristics, and 3 & 4 being similarly equivalent to C & D. E.g., grade B2 would be similar to BB except that one side might have visible flaws that don’t affect the structure of the wood.
There’s one more wrinkle to plywood grades: Baltic Birch (at least the Russian variety) uses a different grading scale that has one or two-letter codes, separated by a slash, describing the two faces (e.g., B/BB is B on one face and BB on the other). B is the highest grade, with that face having no visible defects beyond tiny (“pin”) knots and minor streaking. BB is the next grade, which may have patched areas, but the patches will be matched for color. CP is essentially BB that didn’t make the grade, and has a few more imperfections allowed. And the lowest grade is C, which may have minor splits as well as non-matching patches.
CDX is an outdoor grade of sheathing (plywood used structurally that isn’t visible, which may be exposed to humid conditions). The name reflects the fact that it has C and D faces and short-eXposure waterproof glue (“exposure 1”). RTD, which apparently just means that the wood is “rated” for sheathing use, is a somewhat unclear term. I’ve seen reference to it being similar to CDX but costing half as much. However my local big-box home store sells it in place of CDX and at the CDX price. I’ve seen some online mentions that “RTD” stands for real-time temperature detection, and it refers to continuous monitoring of humidity levels in the kiln drying the wood. RTD-dried wood being more consistently of the right moisture content than non-RTD wood. It may simply be a new form of “CDX”, but I’m not certain. For model railroading use, it can probably be assumed to be the same.
CDX plywood in 3/4” is a good choice for beams and other hidden board-like uses where you can work around imperfections in the faces. Not only is it relatively inexpensive, the glue will hold up to humid basement or garage environments over the long term. Many common “project panels” are grade BC, where one side is visibly better than the other, but imperfections can occur on either. This would be interior-use plywood, where use in damp environments would be more of a concern (unless it was painted to seal it).
Depending on your local suppliers, an interior-use higher-grade plywood panel may actually be cheaper than CDX. It’s worth doing some checking of multiple suppliers.
If you’re using plywood for a fascia, valence, or a visible table-top, one face needs to be grade A or B. If you’re only using it for subroadbed or beams, grades C and D are okay.
My local home store has a variety of plywoods, both softwood and hardwood. In 1/2” all were three-ply except for a furniture-grade Birch which had seven plys (oddly some other furniture-grade plywoods were three-ply). In smaller 2x4 panel sizes the birch (not Baltic Birch, just ordinary Birch) was only 30% more expensive than a BC-grade panel, but in large sizes the difference against the least-cost options (which had lesser grades) was more than 2x. However, this varies from store to store, and from size to size.
Typical 3-ply and Birch 7-ply 1/2” panels
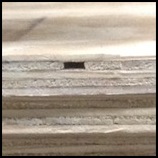
3/4” AC 5-ply with a void
Types of Plywood
Plywood is also sold with specialty designations. As noted above it may be interior or exterior, which refers to the glue used and the suitability of the material to be used or temporarily stored outdoors.
It can also have application-specific designations. For example “sheathing” is intended for uses like roofs and floors, and may have large visible imperfections that would normally be hidden under the flooring or roofing material. And there are also specialty varieties, e.g., “pressure-treated” is intended to be used in exposed damp-environment outdoor locations such as decks without painting. Unless you’re building a garden railroad, pressure-treated plywood is not needed.
Note: if you do use pressure-treated wood, keep in mind that the dust is not only bad for your lungs because it’s dust, it’s also laced with a toxic chemical (to prevent mold and mildew). Use a respirator and clean up afterwards with a good HEPA-filtered shop vacuum cleaner that won’t simply pump fine dust back into the air.
Hardwood plywoods often have only the faces (or even one face) made from the designated wood, and interior veneer layers may be other kinds of wood including softwood. Faces will also often be very thin (to make the material less expensive) and thus more easily damaged during construction. Hardwood plywood is most often made from Birch or Maple, but other woods may be used.
Baltic Birch (don’t confuse this with normal Birch plywood) is a specialty plywood intended for furniture use, where even the edges can be exposed and still look good. It uses thicker-then-usual outer layers with thin interior veneer layers (i.e., more layers) of the same birch material, and all layers are free of voids (missing pieces where knots were cut out and not patched). However, some material sold as Baltic Birch is actually a cheaper imitation with non-Birch interior plys. True Baltic Birch comes from the area around the Baltic Sea, typically Estonia, Finland and Russia. Baltic Birch is sometimes sold under the name Russian Birch. Anecdotally there are differences between Finnish (the original) and Russian “Baltic Birch”, but lumber yards tend to sell either kind under the same name, so in practice they’re the same unless you’re very careful about what you buy and from whom. For our purposes, the distinctions aren’t likely to matter. Both are great material for fascia and valence construction. Note that Baltic Birch can still have different face gradings, but it uses a Russian scale rather than the usual U.S. one.
Knots
Knots are more of an issue in dimensional lumber, because they go all the way through. In plywood, a knot only exists in one of several layers, so any failure of the knot has a lesser effect.
Knots are essentially separate parts of the tree, held in place often only by the sap of the tree. As wood dries, they can fall out. Also, they’re often hard, and drilling into one or cutting through one can cause it to shatter.
When attaching two pieces of dimensional lumber with screws or nails, avoid knots on either piece. Also don’t cut boards through a knot, leave several inches of good wood on either side.
Finally, when using dimensional lumber as a support beam, any knot at or near the edge of the beam (rather than in the middle) will weaken the beam. It’s best to cut beams to avoid this problem, even if it means wasting some wood (which perhaps you can re-use in less structural applications, like risers). If you must include an edge knot, place it at the bottom of the beam where it will be compressed by any load on the beam, and consider painting or varnishing that part of the beam to lock the knot in place so it won’t fall out later (varnish that lets you still see exactly where the knot is would be best).
You’ll often end up using wood with lots of knots, unless you want to pay more for a better grade. But with care, you can select pieces that don’t have too many large or edge knots, and cut around the ones that do exist.
Applications
Wood can be used in a number of ways on a model railroad. Structural applications, where the strength or stability of the wood matters, are the most common. These include benchwork, supports for backdrops, table legs, and subroadbed. Table tops that will be hidden from view under scenery are another example. Finish applications, where the wood is visible on one side, such as on a control panel, layout fascia or valence, or under-layout shelving or cabinets are the other major kind of use.
Structural Beams and Verticals
People have long used dimensional lumber for layout benchwork, either as simple beams or in L-girders. Supported properly lumber of 1x3 (nominally 1” x 3”, but dried this is 0.74” by 2.5” or 19 mm x 62.5 mm) or 1x4 (0.75” x 3.5”) can work well for benchwork. For very lightweight applications (e.g., foam tables), 1x2 can work also.
Dimensional lumber laid flat (called a “plank” or “board”) is very prone to sagging between supports, so it is usually used in a vertical orientation either “on edge” (called a “beam”) or lengthwise. It still needs to be supported to keep it from bending to the side on longer spans (this is why L-girders can cover longer spans than simple beams; they have a built-in sideways support).
Wood is actually made differently for board and beam applications, but usually the smaller dimensions we use are made for board use, and we end up using them as beams anyway. If you go to the lumber yard and ask about “beams” they’re going to try to sell you 2x6 or 2x8 beams, because that’s what they have. What we buy is typically nominally 1” thick, sold as “boards”.
Dimensional lumber can also be used for legs (typically a 2x2 square post) or as vertical supports attached to a wall (typically a 1x3 or 1x4 size).
If you use “common” grades for beams (and you probably should, for economy), you’ll need to take care to avoid knots where these would compromise the structure or make later attachment of other lumber a problem. This is probably a reason to use #1 Common rather than the cheapest #2 Common.
More recently, there’s been a trend in layout benchwork to using cut 3/4” plywood as beams. This is the same thickness as 1” dried lumber, but much less prone to sagging or warping (it can still do both if not properly supported). Since this is hidden, grade C or D is fine, although as with Common dimensional lumber and knots, you may need to work around voids. CDX sheathing is often used for this purpose.
Modular layout standards will sometimes call for either hardwood or hardwood-plywood as the end beams on a module, for increased strength and durability. Otherwise, you don’t normally want to use hardwood in beams, as it’s much more difficult to screw into or saw, and the added strength is rarely required.
Subroadbed
This is a place where plywood is the best choice. The usual recommendation is to use at least 5/8” (16 mm) although some recommend 3/4” (19mm). Subroadbed needs to span fairly long distances without support, often 16” (41 cm) or more. Dimensional lumber is likely to sag badly under these circumstances. Even thinner plywood, like 1/4” (6 mm) would be problematic over time.
However, this is a structural role. Subroadbed is always going to be hidden under ballast and scenery (see Table Tops below for an exception). And you’ll need to cut it to shape out of sheets, so you’ll end up wasting a fair amount of material (some or the scrap can be used as risers or smaller structural pieces). This means that you can choose a lesser grade of plywood here (e.g., grade C or D faces) and just cut around any problem areas. CDX sheathing may be appropriate, particularly if you’re buying the same material for beams.
Table Tops
Although less common now, one typical method for making a model railroad is just to lay a 4x8 of plywood atop a frame of dimensional lumber (e.g., 1x3 or 1x4 beams). I used a similar method to make my 2x4 tables as the supporting structure for Sumida Crossing. Assuming you will support this on all four edges and in the middle you can get away with thinner plywood. I used 1/2” plywood of BC grade on my tables, since portions would be visible as the “river” surface. I supported mine every 24” (61 cm). If you want to make a larger table kids (or you) can climb on, using 3/4” plywood with supports every 16” (41 cm) is probably best.
If the plywood will be entirely hidden under scenery (either flat or cut out into flat and subroadbed sections, a method called “cookie cutter” construction) you can used a lesser grade (e.g. CD), but you may need more frequent supports if using thinner plywood and the cookie-cutter method, as the cuts will prevent the material from supporting itself.
Fascia, Valences and Backdrops
A common material for all of these is hardboard, sometimes sold under the brand name Masonite. This bends well around corners and is easily cut, particularly in 1/8” (3mm) size, although sometimes 14” (5 or 6 mm) is used. However 1/4” plywood can also be used, particularly if you need to place supports further apart. Hardboard may tend to bow in or out between supports over time, although mine has remained fairly stable over 4+ years where it was rigidly supported (I had one that wasn’t bolted down tightly that bowed).
If using plywood, you’ll need to use at least a B grade on one face for this. Using Baltic Birch will provide for nicer-looking edges on fascias and valences, but is an unnecessary expense on backdrops. Since the valence is often up out of the normal line of sight, using ordinary plywood rather than Baltic Birch is probably okay, but this will depend on how likely people are to look at the edge.
I made the backdrop and fascia on Sumida Crossing using 1/4” hardboard, and the box structure on my One Point Five Meter Line using Baltic Birch. I’m likely to use Baltic Birch for any new fascia, and probably also for the valence.
Shelving, Cabinets and Control Panels
A well-planned model railroad is going to have small shelves along the fascia where people can set down beverages or write notes on train-orders. It may also have control panels with frames made of wood (often the panel itself will be metal or plastic) and under-table shelving and cabinets.
Furniture construction is a complex topic in its own right, and there are many better people than I to provide advice. If you’re making shelving units or cabinets, go read up on those.
In general dimensional lumber is probably better in most of these applications, as the edges will look better, and can be easily shaped with a router (or simply filed and sanded to lightly bevel the edge). This is one place where you probably want to select the highest grade you can afford, and it may be worth using hardwood (particularly for shelves people will use for writing).
Lumber Storage
Buy lumber before you need it and let it get used to the room where the layout will be located by storing it there. But lumber stored improperly will warp, often ruining it for use. Some basic advice:
Don’t store wood outdoors, on a basement floor, or leaning against an outside wall. All tend to be damper environments.
Do store wood in or near the same place you plan to use it, so moisture levels will not change when used.
Store plywood flat and well supported, with sheets on top of sheets. If stored on the floor, place a number of 2x4 beams underneath to allow air to circulate.
If you only have a couple of sheets, storing it vertically may be better (again keep the edge off the floor, and “vertically” doesn’t mean leaning against something.
Store dimensional lumber flat lengthwise if possible (but well supported), otherwise vertically (not leaning).
If you have more than 4 or 5 pieces stored flat, place some thin wood between every 4th or 5th layer periodically along the length, to allow air circulation.
Here’s some advice (and a video) on building a lumber rack. It’s aimed at woodworkers who keep a continual supply, but much of the advice can also apply to someone keeping wood for a year or two during layout construction.
Some people recommend storing lumber in the layout room for one winter before use, so it can match the final moisture level. Given that even a well-dehumidified basement can vary from 20% to 50% humidity over the course of a year, and even higher during rainstorms, it’s not clear to me that long-term storage really provides any benefit. Storing it for a few weeks before use is probably a good idea though, and longer if the lumber yard kept it outdoors, but more than a couple of months probably provides no significant benefit.
