


Foam Scenery and Other Additions
After the tables themselves were built, insulation foam sheets were layered above this to provide a three-dimensional landscape. This began in October 2009 and continued through December. In late November 2009, this website went live, although I’d been creating pages and writing posts about layout progress offline before then. Following this, the first major scenery section to be worked on was the “village” area of the River Crossing scene, in February 2010. This gave me a chance to try out my planned approach to building landscape with horizontal layers of insulation foam, rather than the sandwich or vertical foam sheets normally used to carve mountainous terrain.
The painted surface of the wooden table provided a “water level”, and a layer of 3/4” foam (equivalent to 9’ 4” or about 2.9 meters in Japanese N-Scale) provided the first “ground level” above that. This was used for the embankments along the rivers and for the ground level below the urban station. Where needed a second layer of 2” foam was placed above this, to allow for a subway tunnel and to provide raised banks along the waterways. A third layer of 2” foam was used in the corners of the River Crossing scene to add to the sense of the land sloping up away from the river there. While most of the foam was pink insulating foam, I also used Woodland Scenics inclines and risers to form the grades for the track (these were all 2% grades).
Track Planning
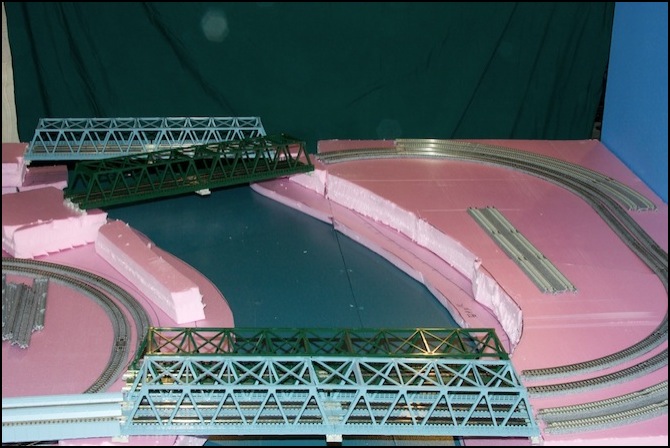
The track plan evolved over the previous summer was reviewed and adjusted once I had the tables in place, with unitrack laid atop the tables to get a feel for how crowded it looked and whether there was a natural-looking appearance to the curves. While I was doing this, I also set the first layer of foam loosely in place and began planning where to cut it to make the scenery contours, test-fitting track, track structures like bridges, and buildings as I went. Lots of revisions to the original track plan details and re-design of the scenery went on at this stage.

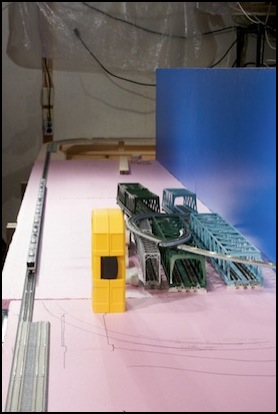
Track Layout checking (L) and Scenery Planning (R)
Completing the Oval
In the original plan, the layout was going to be a U shape to start with, and the other end would be closed only when I was ready to build the helix down to the storage tracks. I quickly decided this wasn’t going to work, and constructed the “unsceniced” end to close the loop off (initially just with the subway-level portion). Then I laid a complete oval of Unitrack and ran my Chuo E233 around, giving it the honor of “first train” run on the layout (even if all the track was temporary and powered by a single track feeder from my Kato power pack at that point). This also let me see just how a ten-car train looked relative to the size of the “scene” areas, and gave me a more visual understanding of the layout for my planning.
I also used this opportunity to see just how badly speed was affected by voltage loss, by putting a pair of insulated Unijoiners in the track near the feeder, and watching the train speed up as it crossed from the rails 30’ from the feeder to the track inches from the feeder. The change was substantial, and confirmed the need to have multiple feeders around the layout, even for a simple oval of track. That matches the conventional wisdom of model railroading, and what I’d read other places, but I wanted to see for myself, and I did.
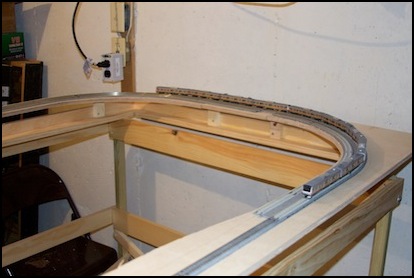
The first train rounds the to-be-hidden subway curve
How Many Layers?
My initial plan had been to have more than just two layers of foam. I did a number of tests using structures and layers, taking photographs from typical viewer perspectives, to see how these looked and to allow me to review them while doing planning. I really didn’t like the look of the multiple layers, although I stuck with it for several months due to my desire to have the subway tunnel inside the foam. Finally I decided I had enough clearance to build a tunnel inside the 2” layer alone and cap it with a thin material, and that decided me.
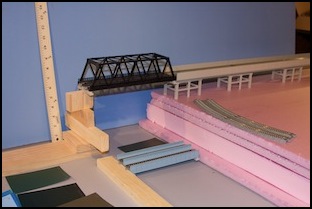
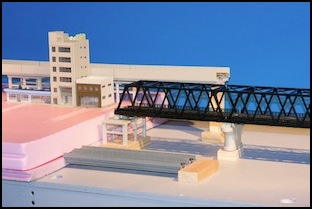
Tests of multi-layer (L) and two-layer (R) topography
Building the Scenery
Once I decided on two layers, I could start construction. First I cut the foam I’d previously marked, and test-fit it again to ensure everything worked as expected. At this point I started having some doubts about making the entire area inside the River Crossing scene loop be at the high level, but set aside that and other issues with the second layer of foam for later, and focused on getting the first layer where I wanted it.
With the table surface painted, the wood was no longer porous, so wood glue would not grip strongly to it, neither does it attach strongly to foam. But the foam doesn’t need to be held too firmly in place anyway, so I cut it to shape and glued the first layer to the table using yellow carpenter’s glue. I applied this in a bead, and then spread that to a thin film using a small square of cardboard cut from a cereal box. These made good disposable spreaders, which I could toss in the trash as they became coated with glue. Once the foam was in place, I weighted it down overnight with any available objects (tools, paint cans, etc) to allow the glue to set firmly.
During this period I also repainted the backdrops in a lighter blue color, as I’d decided that the original color was too dark. This eventually became irrelevant when I decided to cover them with photographs, but that was still a year in the future.
All told, I spent about two months thinking about things and doing this work. I could have done it much faster, but a lot of that time was spent just looking at Unitrack set atop the foam, and trying to decide if I liked the results, or if I wanted to go back and revise the track plan before going further.
Village Area
The riverbank inside the big curve was going to be filled with a residential area I called “the village”. I spent some time considering whether I wanted this at the same level as the track, before deciding to put it atop a second 0.75-inch foam layer, which would put the track above it on an embankment.
Material formerly on this page has been removed, and the scenery construction of this are is now described in greater detail on a separate River Crossing Terrain page.
