


Fascia
The Fascia of a layout is the trim on the outside edge of the layout. The word is an odd one, from the Latin for “band”, and in architecture can refer to a flat band between moldings (it’s apparently also a British English word for a car’s dashboard). It can also mean “a broad and distinct band of color”. The purpose on a layout is to hide the structure below the scenery, which is often simply an open grid of small dimensional lumber. In my layout, it’s hiding the edges of the support boxes and the foam atop those; I didn’t try to hide the framing below them.

Layout with finished fascia - River Crossing scene (Hokutosei “Blue Train” rounding the curve)
My fascia is made from 3/8” tempered hardboard (aka Masonite, although that’s a specific brand and I used generic stuff from the local home supply store). What I used has one side rough and one side polished. These are cut so that the upper edge rises a bit above the scenery (not much, perhaps 1/4” most places), to provide both protection for the scenery and to catch runaway trains.
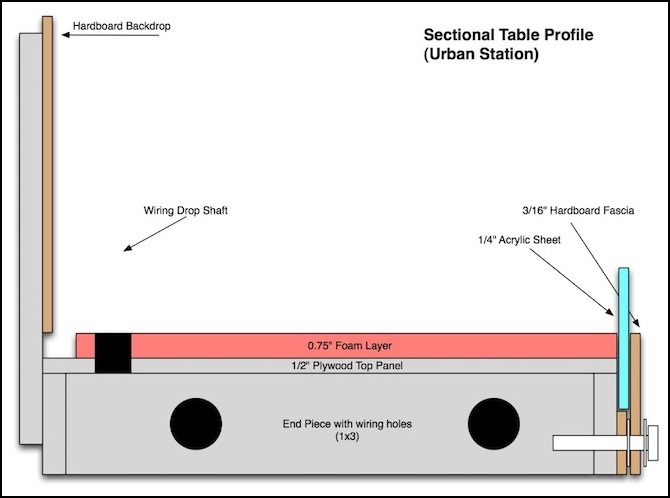
Table cross-section showing fascia design (version used with plexiglass)
I painted both sides after cutting, using gray primer first to seal the wood. Tempered hardboard is both porous and oily, and without a seal the oils can discolor paint. First I primed them with two coats of primer (outside and a strip along the top inside), and when that had set, applied two coats of a bright green latex paint (Glidden Forest Green) as a finish coat. I used the same small foam roller for the front (shiny) side of the hardboard as I had for the original table painting, but for the back (rough) side, I daubed paint on using a disposable brush, to make sure I filled all the little gaps in the surface. On the back, I only painted the visible portion (plus a bit extra).
While the primer dries quickly, latex paint takes longer (more than a day) and even then isn’t fully cured. I found it could be damaged by clamping it to the layout a couple of weeks after painting. I repainted the damaged pieces and let them sit for a month before attaching them to the layout.
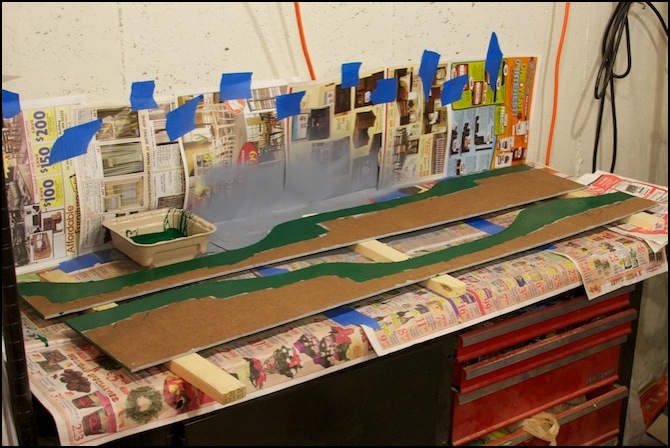
Fascia backside
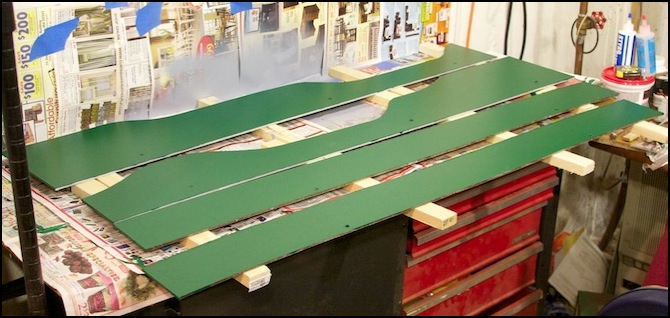
Fascia front
BTW, cutting hardboard with a circular saw is VERY dusty work. I’d cut the first two with a saber saw, and this was relatively easy to clean up. But I wanted straight cuts on the two new ones, so I used a hand-held circular saw, and it threw dust everywhere. I eventually had to remove the buildings from the River Crossing scene and vacuum it, as there was a faint tinge of brown dust everywhere. Oops.
The fascia is mounted with bolts and washers so that it can easily be removed (some wiring is run behind it). Additionally, on the Urban Station Scene and Riverside Station Scene it is used to support a 1/4” plexiglass sheet behind it, so I stood it out from the edge slightly (these also provide a support for the plexiglass). The plexiglass on the Urban Station allows viewing under the elevated station, which still preventing a derailed train on the front track from hitting the floor. On the Riverside Station scene the plexiglass additionally provides the windows into the subway station, also preventing derailed trains there from coming out.
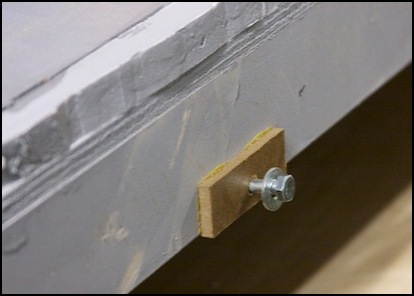
Close up of bolt and block for mounting fascia
Below is the final appearance of the fascia with the plexiglass sheet behind it. The plexiglass has a slight curve to it, so getting it seated into the slot requires a bit of work (one end first, then the other), but it stands perfectly straight, and removing it is a simple matter of grasping it near the ends and lifting; it comes up easily.
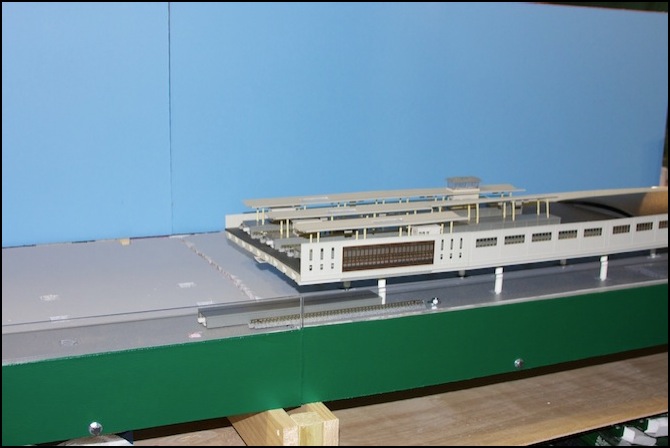
Fascia and Plexiglass mounted on Urban Station scene
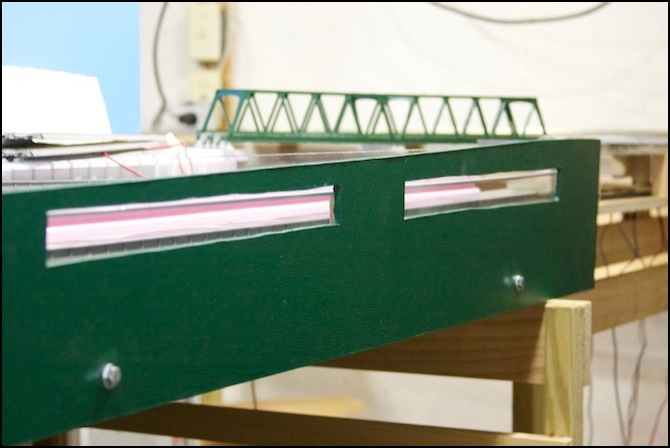
Fascia with windows for subway station of the Riverside Station scene (under construction)
