


Detailing a Kato Commuter EMU
28 September 2010 01:21 Filed in: Model Trains,DCC
I haven’t done much work on the layout recently. Aside from having fun running trains, I’ve been working on finishing up my first DCC train. I started added DCC decoders (motor and cab) to this train last October.
Yeah, I work more slowly than a real railroad. But until recently, there wasn’t much reason to rush since I couldn’t run the train on the layout yet. That changed a couple of weeks ago, when I completed the outer loop and all of the DCC systems supplying it with power.
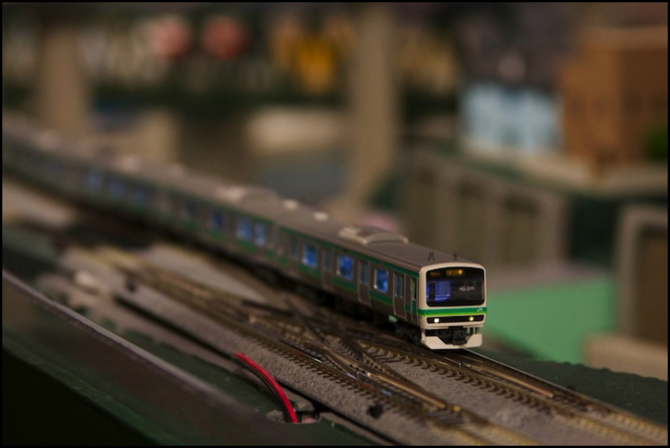
In addition to adding the DCC decoders and the interior lighting kits, which is described on my Equipping a Kato “DCC Ready” EMU page (updated), as well as adding the usual Kato stickers (destination signs) and antennas to the cab roof, I also provided a bit more interior detail, in the form of painting the molded plastic seating and adding semi-painted figures. This is all described in quite a bit of detail, with photos, on my Detailing an EMU page. A couple of the photos have also been added to the Train Photos album.
Photos don’t really do this justice: close-ups show the flaws you can’t see, and while distant photos might be better, you can’t really appreciate what it looks like without the train moving. So I made a brief video to compare an unlit train to this one both lit, and lit with figures added.
I’m fairly happy with the result, although the flickering lights are a real nuisance. I believe this is due to poor contact in the truck-to-body connection, due in part to the light cars bouncing on the sprung trucks (but adding a moderate weight doesn’t seem to help much). I have some thoughts about solving that, involving small capacitors and rectifiers, but haven’t started serious work on that yet, beyond some design work on the duration I’d get (tens of milliseconds, which might be enough); building a prototype is a project for another day, and I won’t write it up until I’ve seen if it works.
And rather than the unpainted Preiser figures I used, I may use cheap painted ones available through Ebay for the next train; I think the extra color is needed. I only found out about those after I’d bought my first batch of Preiser figures.
== Comments copied from old system:
Tuesday, September 28, 2010 - 12:19 PM
Don
Some of the interior light flickering, I've found (forgive me if I've said this before), stems from the circuitboards not making good contact with the brass pickups in the plastic holders. I found that if you bend the brass pickups outward, so that they are actually sitting just outside the channel they are supposed to sit in, they make better contact with the circuitboard (but make sure that they aren't bent out so far that the circuitboard just sits beside the pickups, rather than on them). I bet a tiny tiny shim placed behind the pickups would do the same job. Either way, flickering is cut down a lot doing that. Also, the lighting units are very, very sensitive to dirty wheels/track! I have to clean my 11-car Yamanote Line train a little too frequently for my liking. So I'm looking foward to any kind of capacitor mod you decide to try out!
Wednesday, September 29, 2010 - 12:49 AM
KenS
I'd seen the problem with the lightboard contacts, although I'd mostly noticed it when the board got knocked sideways a bit while installing the body. And some of the cars do seem worse than the others, so I'll take a look and see if a bit of bending improves those.
I've cleaned the track but not the train wheels, that's probably something I should look into.
Parts were ordered from Newark yesterday for my capacitor test; it remains to be seen when I'll find time to actually carry it out.
