


Hybrid Design and Temporary Scenery
There’s a “right” way to build a model railroad: build some subroadbed structure (often plywood screwed and glued in place, sometimes foam held together with glue), add roadbed (paperboard or cork are typical, a type of foam rubber is also used) held in place with wood glue or similar, attach track (held in place by silicone caulk, or temporary nails), and apply ballast (crushed stone or artificial granular substances) glued in place with diluted white glue. Make sure the track works, protect it with tape, wax paper, and other things, then add scenery of carved foam, plaster cloth or other material, paint it, glue down ground scatter, shrubs and other scenery, and plant buildings in places prepared for them.
This approach produces everything from the basement-filling layouts typical of North America, to the smaller layouts found in Europe, right down to the switching layout-on-a-shelf more typical of the space-constrained builder (common in the U.K., but hardly limited to there), as well as modular layouts that only get set up at club meetings and shows. Smaller layouts often use a box structure for the subroadbed rather than the more material-efficient approaches (like L-girder) used in larger layouts.
It is, effectively, the collective wisdom of decades of western modelers (North American and European in particular), promulgated in books, magazine articles, and today web postings. And it’s not a bad approach; it’s the collective wisdom because it works and has proven itself capable of producing long-lasting and reliable model railroads.
But it’s not the only tradition. In Japan, where residential space is at a premium, and space for permanent layouts is largely non-existant, many modelers build temporary layouts, where the scenery is largely in the viewers mind, helped along by props such as pre-made buildings. You can still be a serious operational modeler with that kind of track (operations is, after all, about where the trains go and what they do, not about the scenery). And some Japanese modelers seem to share the British focus on operating passenger services to a timetable, rather than the kind of freight operations that produced car-order systems based on index cards that you’ll often read about in the North American modeling press. And, of course, many owners of both kinds of railroad are just interested in watching trains run, and aren’t operations-focused at all.
Layout Design and Use
Now I’m clearly one of the latter crowd. I may eventually do some kind of formalized passenger operations, but mostly I’m content to run my trains around and stop at stations. There’s a nod to prototype operation (I’m not going to suddenly change direction, for example, because real trains only reverse under carefully controlled conditions, for safety reasons). But prototypical operations is not my focus.
And, with Sumida Crossing, I decided to break with tradition and strike a middle ground between the permanent crafted layout and the evanescent temporary one. Part of the reason for that was that I wanted something now, not several years from now. It’s arguable that I failed in that regard, as two years on and I still have never had the Commuter loop operational, and at the moment the Subway loop has been “apart for maintenance” for 11 months. But for good or ill, that’s the path I chose, and I continue to walk it. Or crawl, perhaps.
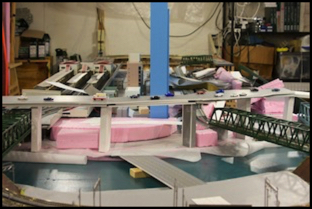
As anyone familiar with this site knows, I’m using a sectional design based on a fairly solid plywood box table structure (akin to a modular layout) with permanent topography formed of carved foam, plaster cloth, and sheets of plywood. And on that goes a roadbed of foam rubber (Woodland Scenics Roadbed) or cork where I’ll have track. But then I break with tradition. Atop the roadbed goes Unitrack, not at all held in place. And in lieu of ballast, the roadbed foam is painted with gray artist’s acrylic paint, which lets it remain flexible buy also allows it to blend in. And while my scenery may someday be more traditional, today it’s mostly latex housepaint over the plywood and foam, to give an appropriate color, so I won’t have to stare at the pink foam or white plaster for months on end.
The layout is permanent in the sense that I can’t easily change topography or the track plan (without the same kind of construction work a traditional permanent layout would need) and temporary in the sense that I can remove the track during construction, or if I want to clean or paint it. Right now, I can strip down the layout and clean it with a shop vac if/when it gets dusty from any construction work. That’s handy, and not something I could do easily if I had scatter or scenic details in place.
Somewhere down the road I may get to a point where I want to glue and ballast track (and maybe switch to flex track), and I definitely want real scenery, but for now I like the flexibility of being able to work on scenery or track without having to worry about the two being permanently affixed to one another.
Temporary Scenery: What is it?
What does all this have to do with “temporary scenery”? Well, part of my flexible approach is that I’m taking an iterative approach to the scenery. The first version of ground cover or roadway surfaces is latex paint. Later I’ll add scatter for grass and shrubs (someday; it’s not a priority). And roads, parking areas, and sidewalks will be constructed of styrene or plaster and detailed. In some places the surface is sheet styrene, and the paint is aerosol from a can, but it’s the same principle either way: suggest the type of material with color, and leave the details to the viewer’s imagination. This works because they have other details to focus on: the trains, buildings, and backdrops.
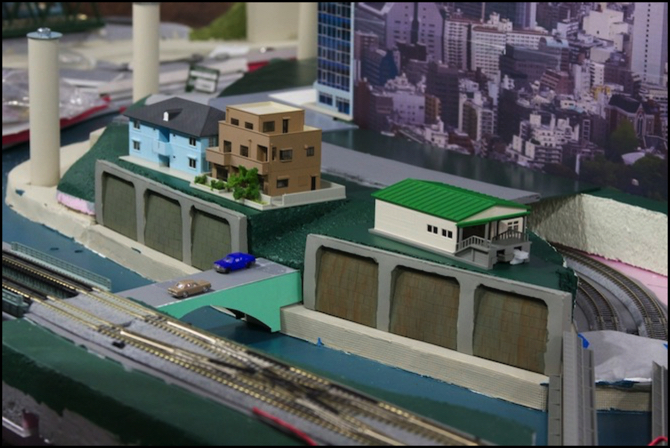
Another thing I’ve done is temporary structures. The image at the top of the page shows a simple green bridge with two cars on it. This was made from a chunk of gray-faced foam-core for the upper surface (it also provides the structural support) and two sheets of green cardboard, cut from a spare Kato building box and taped together. It took all of five minutes to assemble, and while it’s clearly not a particularly representative scale model, there’s no doubting that it’s a bridge. And that’s all it’s supposed to be, the suggestion of a bridge, for the viewer’s mind to fill in. Do I want a realistic-looking scale bridge there? Of course I do, but that’s only one of dozens of projects. Until I get to that one, the cardboard bridge will have to suffice.
Similarly, when I first decided I wanted an elevated highway, the original structure was very primitive. The first version was entirely made from gray-faced foam-core. The upper deck was two thicknesses (a deck and a narrower support below) and the posts holding it up were box structures made of four rectangles of the same material, as seen below (you can see larger versions of the highway in the Highway Photos album).
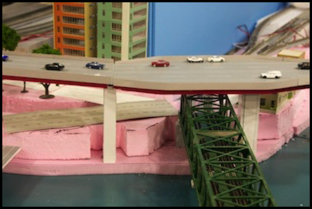
The “foam core” expressway
The foam-core expressway served as the highway for a number of months. The deck was elaborated with sides and girders made from colored paper (which, unfortunately, didn’t last very long as the double-sided transparent tape I used proved too weak) Eventually the support structure was replaced with painted PVC tubes and a length of plywood (continuing to hold up the foam-core roadway). That was in a sense the second iteration of the expressway. The third is currently ongoing, with the construction of upper-deck segments of styrene that have been painted and detailed.
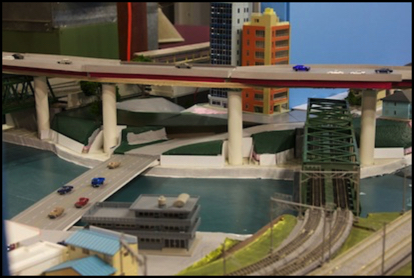
PVC Supports
The grass beneath the expressway (green latex over carved foam), the roadway (gray latex over carved foam), and the bridge over the river (a simple slab of foam-core marked with lane dividing lines) are similarly all placeholders. They’re there because I haven’t yet gotten around to working on the final version, but they vastly improve the appearance over the pink foam in the previous images.
You can think of the buildings as temporary also. These are straight from the box ready-to-plant structures from Kato and Tomix. They lack interiors, lighting, and even exterior details like signs that came in the box with them. And that’s because one of these days I’m going to treat each as a model to be finished, with lighting, interiors and exterior detail. It’s even likely I’ll paint many of them, since I’m not overly fond of the original colors or “plastic” look of some of them.
But the idea behind all of this “temporary” scenery is that it gives me the impression of scenery (much like a scatter of buildings do on a temporary floor layout). So I’m not running trains through bare plywood and foam scenery for years while I wait to finish projects.
Having done things the more traditional route in the past, and spent years looking at bare plywood, I have to say I like this approach better. I’m sure it’s not for everyone. And it’s not even my ideal, just something I’m doing for now, before I get to “someday”. But the temporary scenery looks pretty good to me for now, and I’m usually looking at the trains anyway, not at what’s around them, except indirectly.
