


Almost Scenery
13 February 2012 23:40 Filed in: Scenery
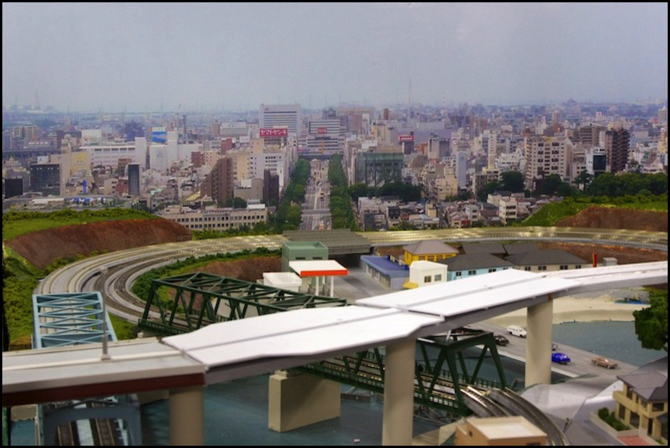
The photo above may not look significantly different from other recent images of the River Crossing scene, but look closer and you’ll see grass and shrubs alongside the tracks. Yes, spring has come early to Sumida Crossing, and there’s ground cover on the hillside above the Village area.
This may not seem major to you. After all, ground cover isn’t exactly rocket science. It’s probably one of the easier aspects of model railroading when you come right down to it. But of all the different aspects of model railroading, it’s the one I absolutely hate. Unlike buildings or track, it’s not precise. And since it uses glue, there’s really no second chance. Like painting a picture, if you make a mistake all you can do is paint over it. There’s no “undo” with ground cover. So getting to the point where I’m ready to take that step is a major milestone for me. The River Crossing scene and its scenery is far from done, but this feels like real progress, at least to me.
Of course one reason I dislike this so much is that I’m not really very good at it. I suppose if I did it more, I’d get better. Somehow that fails to motivate me. I know what good ground cover looks like, and mine is adequate, not good.
All that said, this went surprisingly easy. The last time I did ground cover (many, many, years ago on the old HO layout) I was less ambitious, and the results were less good. I ended up with a uniform field that looked more like the putting green on a golf course: flat, bright green, and characterless. While this won’t stun anyone with its realism, it’s definitely better. Let’s take a closer look:
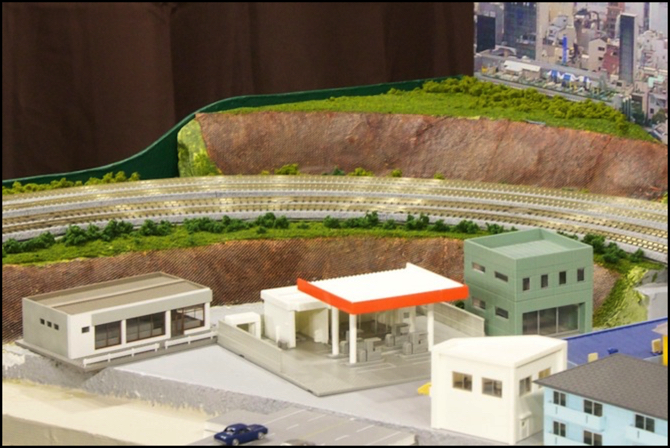
All this is, is Woodland Scenics “blended turf” (green blend) laid over the pre-existing WS green undercoat paint (you can see where I missed a spot at the end of the upper embankment) with some “shrubs” (WS underbrush) in both medium and dark green added to break up the uniformity. I also put down some brown (earth) turf in the area below the lower embankment, but you can’t really see it. It’s still a bit too “golf course” for my taste, and I’m thinking I may invest in a static grass applicator, particularly for the larger area at the top of the upper embankment, which ought to have a wilder look. I am, however, planning to break that open space up with a large electric utility pole (one of the Kato/Heljan high-voltage towers), so perhaps that won’t be necessary.
At present the track has been reinstalled, but needs to be taken off and painted. I have a set of Floquil markers to paint the rails, and I’ve been doing some experimenting with ink washes to dull the bright gray of the ballast and make it look more “rusty” around the tracks themselves. I also need to paint and re-install the catenary poles, and put in some other details, like fencing alongside the track.
Making the Ground Cover
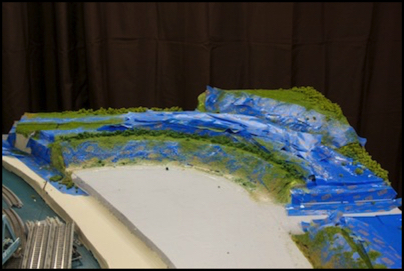
To get to this point, I removed the backdrop, fascia panels, structures and most of the track (I left a few sections that were wired with feeders in place as it was easier) and then I took a shop vac to the scene to remove the months of dust (and some sawdust) that had accumulated. After that, I put down painters masking tape to protect the brown embankments (the ink on them is water soluble and I didn’t want the glue dissolving them), the roadbed and remaining track, and the edge of the gray foam, as well as the bridge abutments.
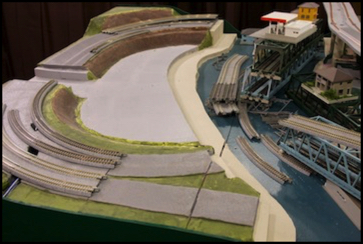
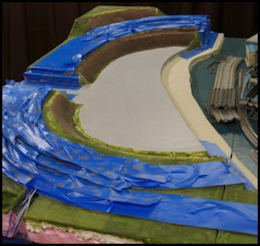
Table cleared for action (left) and masked (right)
From there, I followed the WS directions. Working on one section at a time and using one of their scenic sprayers, I throughly wet the area with their scenic cement, then shook the turf over it, sprayed it again with glue while still wet, shook a second layer over, and moved on. Before the grass had time to dry, but after it had set a little, I came back and sprayed another layer of cement, applied the “underbrush” by hand where I wanted it, and sprayed that with a layer of cement to seal it in place.
Then I left it to dry for two days before removing the tape. And then I ran my shop vac over it (held about four inches, 100mm, above the scenery) to remove any loose material (very little was loose, and most of what was had fallen off the tape when I removed it).
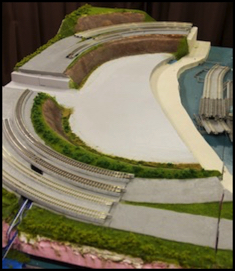
Grass and shrubs applied (left) and after tape removed (right)
It wasn’t perfect. I think the “grass” is too uniform. And I missed at least one spot completely (and there’s another that’s not well covered). Also, despite the tape the glue got onto part of the embankment, and while it didn’t dissolve the ink, it did turn it glossy which looks a bit odd in person. I’ll need to fix that somehow (maybe spray some Dullcote on it). I may go back and modify what I’ve done so far, although it’s fairly close to what I expected to get.
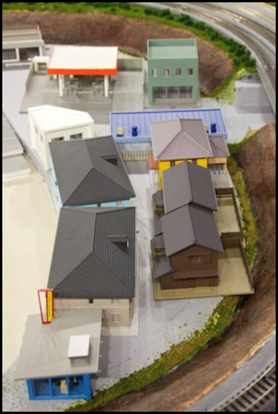
The Village
After that, I put the track back and attached the backdrop, and then put the buildings back in my latest arrangement. I’m still planning the final village layout, but I think I’m getting closer. The part with the gas station (seen up above) is the least certain, as fitting the space is proving hard (I may end up with a small park), but the other side is looking better, although I’ll probably need to remove one of the brown houses from its base to make it fit. The buildings will all be detailed and painted eventually (as well as lit), but that’s still a ways off.
And so, I have scenery. Well if you count green paint I had scenery all along, and this isn’t really much more. But it feels like more to me, even if it isn’t done yet. So I’ll call it scenery, or perhaps “almost scenery”.