


Customizing Buildings II
16 March 2012 23:35 Filed in: Model,Structures
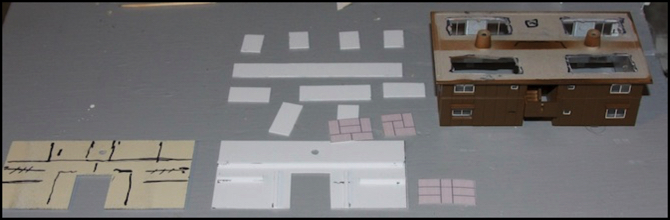
Work on the buildings of the village continued this week, with more painting, some detailing and work on interiors, and the beginning of work on the village scene itself. As before, larger versions of these photos are in the Village photo album.
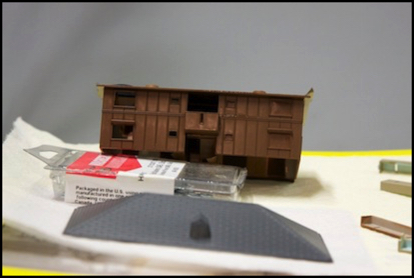
Work on the Gas Station
One thing I’ve been considering for a while is how to make the very large gas station fit the limited space. It comes with a sidewalk part that can be added to one side, and I was clear that I didn’t want to add that. But it also has a large sidewalk/apron area in front of it, and after much consideration I decided that needed to go. My street here is going to have a much smaller sidewalk, perhaps as little as 5mm, and putting this behind the sidewalk didn’t look good or make any sense. Building a custom sidewalk also means it can match the rest of the street, and have clearly separate entry and exit drives.
This is one of those times when my saw comes in really handy. A couple of minutes to set it up (mostly involving getting the saw blade height right for this thicker plastic, and moving the rip fence to the other side of the blade) and zip, off came the old sidewalk. There are some other things I need to cut with the saw (floor plates and 12mm strips for interior walls, for example, plus the street/sidewalk sheets) so this project is going to give the saw some exercise.
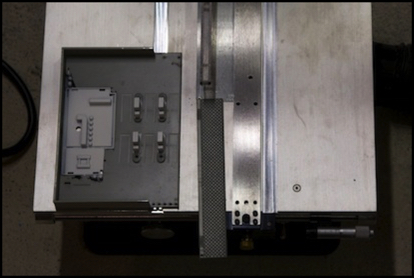
Gas Station on saw, with removed sidewalk
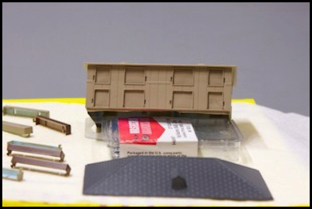
I had some additional work to do here. The base plate isn’t flat, and has a small lip around the outside facing down. I added a strip of styrene underneath the front edge to reinforce the plastic now that I’ve cut off the portion that included the lip. I’m also planning some higher walls around the car wash angled in, as I’ve seen those on real ones, although I may have an issue to deal with there (see the comments below about gluing beams on the awning). Plus I’ll paint some of the interior by brush and may spray-paint the walls (I don’t like their color very much), although they’re solidly glued on, so that may be tricky.
I’m also customizing the awning. One thing I’ve noticed in looking at real ones via Google Earth is that there are usually support beams and fire-extinguisher piping on the top, where it can’t be seen from below. And I think those are nice details to add. Perhaps unsurprisingly, in all of the Japanese gas stations I’ve seen, the beams are painted white to match the awning. American ones text to be left in a natural rust color, and often the “white” awning is rust-spotted since it’s never re-painted on top after installation.
To make the beams I cut some 1mm Evergreen I-Beam strip into lengths that would fit across the width of the awning, and two cross-beams to keep them a fixed distance apart, then stuck them to a bit of masking tape to hold them in place, while I glued small squares of 0.005” strip styrene as gusset plates to hold them firmly together (I trimmed excess with my sprue-cutters).
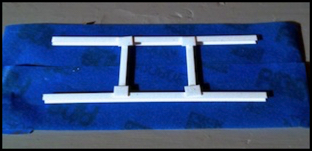
Beam Assembly being glued
I ran into a problem here: the awning isn’t normal styrene, or else it’s painted (but it doesn’t look painted). I think it’s some other kind of plastic. I glued the beams down with a dab of styrene cement on each gusset, and clamped it overnight with a weight. The next day, the merest touch and the beams fell off. The styrene cement had no effect on the awning. I’ll need to use super glue or something else to make this bond, and that’s going to apply to the fire-extinguisher piping and those wall extensions I wanted to add (the walls are the same slick plastic, although oddly the base plate appears to be styrene.
More Fun with the Saw
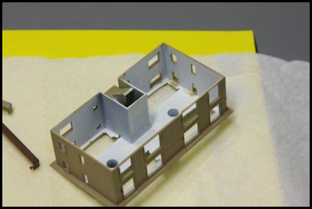
I also needed to make some 12mm styrene strips to be used for walls inside the buildings. This is wider than the usual sizes available, so I used the saw to cut some 1mm (0.020”) sheet styrene into strips. This works fairly well, although I usually lose a bit at the end as the sheet gets pushed out of alignment no matter how careful I am. Still, it’s far easier than the scribe-and-snap approach. Overall the saw worked well doing this.
Where it did less well was cutting out interior flooring. I wanted to keep the wall units separate from the interior base or level divider, so I cut some 0.38mm (0.015”) sheet into 100x50mm (4”x2”) rectangles for this. In doing so, I discovered two things: first, the rip fence has a small gap under it, large enough for the sheet not to sit square against it. And second, that the furthest I could get the rip fence from the blade was 95mm due to the end stops. Removing the rip fence is a major operation, but fortunately the plastic is flexible enough to lift over it, and I could feed the stock using the miter-gauge-and-extension.
As it turns out, this kind of styrene is thin enough to be cut with a sharp pair of good scissors (and I used that to cut out the notches where the stairwell goes), so I could have skipped using the saw. The saw is better for getting perfectly straight lines though.
Painting
Perhaps the most visible work was more painting, although this time limited to the two Kato apartment buildings. The exterior paint was pretty simple, just a single body color for each building and the roof. The roof was painted mainly to give it a less plastic look than the original, although I ended up using a very similar color (Tamiya TS-4 German Gray, a medium gray that works well for roofing) The two building exteriors were painted in a dark brown (Tamiya TS-1 Red Brown) and a light sandy brown (Floquil 13081 Earth).
It was warm enough this past weekend to paint outside, which was nice. It’s very hard to ventilate properly when painting in the basement, so the smell usually seeps into the rest of the house (which isn’t healthy, even when I can open windows to air it out). I limit that to very small quantities of painting. Painting outdoors is much better, but can only be done in warm weather before the pollen becomes a problem (pollen and wet paint don’t mix). I really need to get my spray booth set up with a proper exhaust duct if I’m going to keep on doing this.
When painting, indoors or out, I wear a good respirator with organic-vapor cartridges and discard any paper covered with overspray, as well as my disposable gloves, in outside trash containers so volatiles from them won’t get in the house. Unfortunately the painted models continue to emit a strong smell as they cure, and I can’t leave them out in the weather, although I do leave them out for a couple of hours to dry as much as possible. Then they get tucked away in a corner of the basement for a few days.
Painted Apartment Buildings
The Apartments
The dark brown is, perhaps, too brown. Dried it looks more like weathered wood, and would probably be more appropriate on an older structure, like some of Kato’s more traditional looking Japanese-style buildings. Both covered well, although the sandy color required a number of coats to hide a couple of places where black paint from the interior had got on the outside, despite my masking tape. As you can see in the photo below I had some problems with spraying too close and paint beading up on some details. Mostly I managed to avoid this, but on this side of the building trying to get the stairwell painted made a mess on the walls. I probably should have masked the wall and painted the stairs separately (or planned to go back later with a brush, which I may do on the other one).
To keep the interior white, I masked it. This time using some “frisket” masking paper (thin paper-backed plastic film with a low-tack adhesive; cut to fit, peel the paper and stick the plastic, then rub to seal the edges). Putting this on the inside of the building, mainly to protect the walls, worked reasonably well. I stuck masking tape over the holes on the top, since there was lots of space around them for the tape to stick to and make a seal. I don’t need the interior walls to be perfect, as most are out of view; I just need them mostly white to reflect the interior lighting.
Exterior (yes, these are the same color, the yellow throws off the color in the right photo)
Apartment Interiors
I wanted some visible patterns for the interiors, but nothing too fancy. These are supposed to look like fairly simple apartments. One thing I wanted was a traditional tatami-mat floor (at least in some of the rooms, others may get a more western look). I made a simple mat, and shrunk it to be 75x150 pixels (for printing at 300 dpi as a 6mm x 12mm mat, which is close to the standard size). Then I arranged a few of these into patterns to fit my three room sizes (photoshop elements’ layers capability works well for this), stuck a bunch of them on a 6x4 sheet and printed a couple. I’ll need to trim a couple of mm off one wall as the rooms aren’t quite the right size, but I can do that against a wall where it’s less visible.
Here are the ones I made, full 300-dpi size. Feel free to use them for your own models.
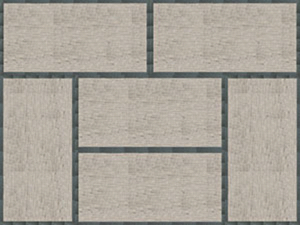
Six and 7.5-mat floor arrangements (N-scale: 225x300 and 225x375 pixels for 300 dpi printing)
4.5-mat floor arrangement
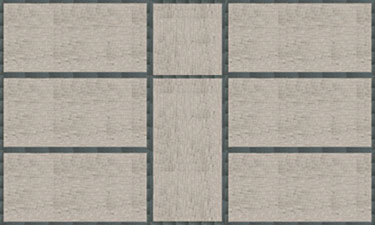
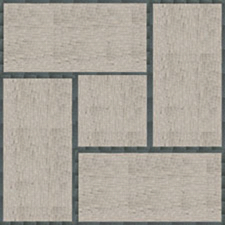
Then I started assembling the floor/wall units themselves. The photo at the top of the page shows the new parts in the middle, with the original floor unit on the left. That’s the current state of progress, with glue drying on the first of these as I type. Once the walls are all up, I’ll paint some sections black to make them less visible, and glue photos on the walls and floors. I should have the two Kato apartment buildings done this week.