


Work Table and March 2012 Status
Work on the village buildings continues, although it’s been slow recently due to other demands on my time taking me away from layout work. This weekend, however, I found time to build a small work table. I’ve created a new Work Table photo album with larger versions of these photographs.
I normally do model building on the dining table or coffee table, but both of those have good surfaces I need to protect when working on them. Of late, I’ve been working on one end of the coffee table with an anti-static mat on it, since I’ve mostly been doing electrical work, and it’s a good surface for taking models apart since it’s soft and won’t scratch them. But I can’t use glue or paint on it either, since I know drips and spills are inevitable. When soldering I usually put a small chunk of scrap wood directly under the item being soldered to protect the mat, but that’s not really a good solution for this. I also needed more space.
For the last month, I gained that space by using a sheet of plywood set atop a cardboard box as a side table, next to the coffee table. This has the advantage of portability, so I could move it out of the way when not in use, and a large surface that I didn’t care about damaging. The wood I used was actually one of the backboards I’d built for my DCC electronics, which had been painted in gray primer. Although the surface wasn’t totally smooth, it proved smooth enough for what I needed. But I’m getting to the point where I need to reclaim that wood for its original purpose, so I needed a new table. My first thought was to buy a new sheet of light plywood and just rest it on the box. But that quickly evolved into a more permanent solution.
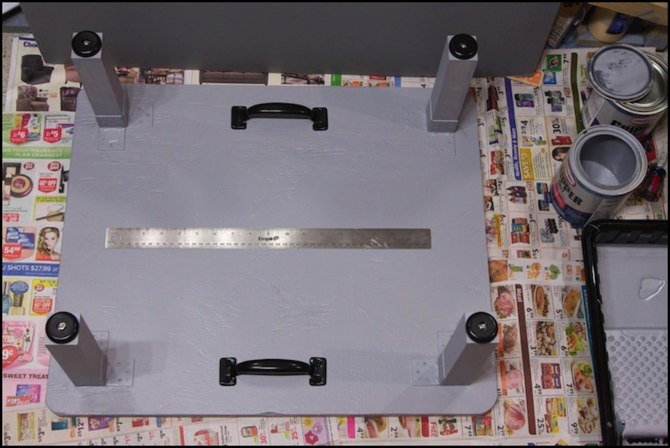
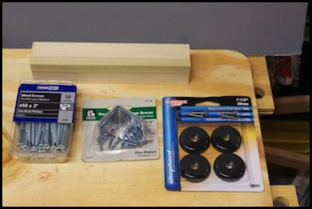
This is a small table, 24” x 20” (61 x 51 cm), made of 3/4” (19mm ) birch-faced plywood, standing on four 8” (20 cm) legs of 1.5” x 1.5” (3.8 x 3.8 cm) poplar. I attached anti-skid feet, mainly to protect the carpet or floor from the wooden legs, and two simple handles for moving the table. All told, parts came to about US$75 (including paint) and it took an evening and part of the next day to finish.
I started with a 2’ square handy-panel of plywood, which I needed to cut down on one side (to fit a gap next to the couch where the table would normally sit when in use). I also rounded the corners. This was done using my saber saw after marking the wood with a sharpie. For the corners, I used a high-tech drafting tool to mark the desired curve: the bottom of a spray-paint can. With the wood cut, I cleaned up the edges and beveled the top and bottom slightly using a wood file, to eliminate any ragged parts that might splinter later.
Note that the plywood I’m using has a clean side with minimal knots and all gaps filled, and a rough side that has knots and even small holes. It’s important to remember which is which before drilling any holes. Also, while I could have sanded the surface, I didn’t see a need to do so, since it was already fairly smooth and the paint will be a bit rough no matter what I do.
Cut lines marked with a sharpie, with can used for corner reference
Next I attached the legs. This actually took the most time. First I cut the legs carefully to the same length using my miter saw. There’s about a 1-2mm variation between them, and there were additional errors due to the attachment. Ideally I could have put on adjustable feet, and maybe I will someday. But this is primarily going to be used on carpet, so a small error isn’t likely to cause a problem, and I can always stick a sheet or two of cereal-box cardboard under one leg if it does.
Left: leg parts, Right: Assembling a leg
The legs would be attached to the surface using angle braces. I’d originally planned to also drive one long screw down into the leg from above, for added strength. But in the end, the braces alone did a fine job for legs this short, and I skipped that step to leave the upper surface of the table unbroken.
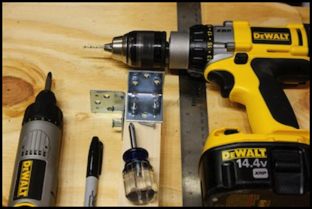
Assembly proceeded by standing a leg up, placing the two braces against it, and then marking the center of each screw hole on the leg with the sharpie. Then I drilled a pilot hole the length of the screws into each marked spot, using a drill about half the diameter of the solid part of the screw. I rested the braces on the leg one at a time, and loosely put each screw in by hand about 4-6 turns. Then, after checking that it still looked square, I tightened the two screws nearest the end down using the electric screwdriver, and then tightened the third screw. Then I stood the leg up to be sure it stood level. In a couple of case the brace wasn’t quite touching the wood of the table-top, but it was close enough (maybe 1-2mm).
Then I carefully placed the legs, one at a time, 1.5” (3.8 cm) in from the corners and square to the edge of the table and marked where the holes in the braces that touched the table-top went. Drilling and screwing those went the same as with attaching braces to legs.
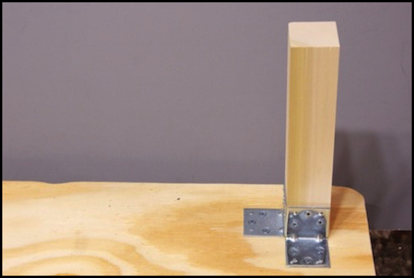
Leg Attached
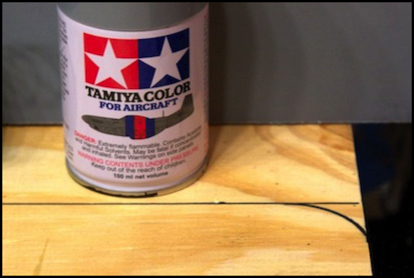
With all four legs attached, it was time to paint. I used the same gray interior latex primer I’ve used for other projects, Glidden Gripper Gray. Using primer is important because it does a good job of binding to the wood, and because it dries quickly. I’ve had finish paint take more than a month before things rested on it wouldn’t stick. With this, I can add a second coat in about an hour, and tackiness should be gone in a week or so.
Paint was applied with a 4” (10cm) finish roller made of foam, which provides a fairly smooth, even coat. It’s not without some texture (due to the foam cells) but that actually helps keep things from sliding around on the table. If I need an absolutely smooth work surface for gluing something, I’ll put a sheet of glass down on the top (I have a couple of glass panes recycled from old picture frames I use for this purpose). I also used a few disposable foam brushes to paint the legs and around the brackets. Most of the underside got a second coat, particularly in places where I could see the color of the wood (too little paint in the first coat, or extra-“thirsty” wood).
At this point I did not paint the edges. The reason is that no matter how careful and even I put paint on, drips at the edges seem inevitable, and if I paint the edges while the table is upside-down, those will form ridges on the edge of the upper surface. So edge painting had to wait for the top to be painted.
But first, I let the table sit overnight to dry well, and then attached the feet and the carry handles to the underside:
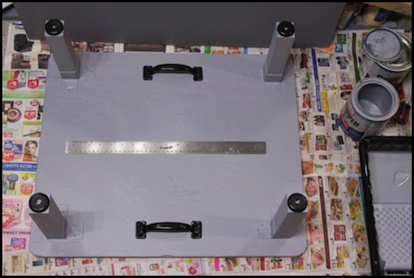
Underside, with attached hardware
Finally, with that done I could flip the table over and paint the top side and edges.
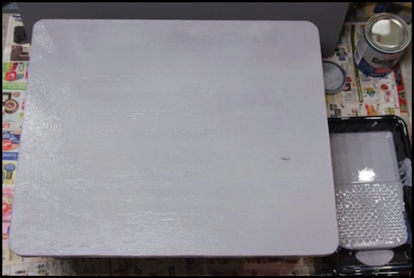
Table from above, wet paint
And there’s the table. I need to let it set for a week or so to ensure things won’t stick to the top if I leave them on it overnight, but I have my work table for model building and painting. One added benefit: the gray surface makes a good background for model photography, and provides a neutral gray reference for setting white balance when I convert my RAW images to JPEGs.
Monthly Status for March
March has gone to work on the buildings of the Village section of the River Crossing scene. I’d hoped to also work on the streets of that section, but haven’t really started that yet, except for laying out some tracing paper and starting to mark where things should go. The paper will be used as a guide for marking and cutting styrene for sidewalks and road surfaces eventually.
Mostly I’ve been focused on the first two apartment buildings and their interiors, but that stalled in the last week. I should be getting back to it shortly. I expect April will go to more work on the buildings, but I also want to finally finish up the DCC electronics (which I haven’t touched in several months) so I can actually start running trains on the commuter loop and subway loop. That will lead me to do more DCC conversions, finally, which I expect will be a summer project.