


Model Railroad Photography I
Most people build layouts to see or run trains, but increasingly we want to share that with people who can’t see the layout in person (or we want to hide the messy bits and show off the good stuff). But taking a photograph of a model railroad layout isn’t as easy as pointing a camera and clicking away. It is, of course, easier with a good camera. But mostly it depends on you understanding what the camera needs to take a good picture, what you can do the take the best picture, and what you can do after the fact to clean it up. Today I’m going to write about the first two parts: preparation and taking the photo. I’ll have a subsequent posting about image processing.
The Basics
For photography, three things go hand-in-hand: “film speed” (image sensor sensitivity in digital cameras) represented by the ISO setting, exposure time (in fractions of a second) and the size of the aperture letting in light (described as an “f-stop” number, like f/13). These all work with and against each other to regulate how much light hits the sensor, and how, and that affects several things of importance.
To get more depth-of-field, you need a smaller aperture (which confusingly means a larger f-stop), a small aperture limits your light, which means you need a slower shutter speed to gather more of it (smaller denominator, e.g., 1/30 is slower than 1/60) or a more sensitive sensor (higher ISO) to make use of what you can gather. But slow shutter speeds lead to blurring from vibration or movement, and high ISO leads to grainy pictures (from amplified “noise”). And all three have to be in balance to avoid over- or under-exposure, which leads to loss of information no post-processing can fix. Let’s review these quickly.
ISO
ISO is what used to be called ASA. Originally a rating of how sensitive film was to light that depended on the roll of film used, now it’s a rating of how sensitive a camera’s sensor is to light that you can change for each photo. Ideally, you’d probably want to use an ISO of 100 or 200 (what’s “best” depends on the camera model), but unless you plan to light the layout with expensive photofloods (which have a very short bulb life for the most part) that’s not an option. At higher ISOs the sensor is doing more amplification of collected light, and that means that noise gets amplified too, creating little speckles on the image.
Most cameras will do “okay” at ISO 400, and some at ISO 800 (newer DSLRs work well at even higher ratings). You have to strike a balance here. My camera works well at ISO 800, so most images are taken that way. If I can sacrifice depth-of-field, I might drop to ISO 400 to get a cleaner picture. I’ve used ISO 1600 (which is visibly grainy with my camera) when circumstances required it, but I try to avoid that.
Aperture
The f-stop rating is a number from about 1.4 (on lenses few of us can afford) to around 22. Small numbers create shallow depth of field, which is useful for blurring the background. But unless you only want the front of the train in-focus, that’s not an option in most model-railroad photography, and maximizing depth-of-field is more important. I’ve found f/8 to be a reasonable compromise for most layout photography. Higher numbers just aren’t practical with my lighting, and I get about a one foot (30cm) depth that’s of reasonable sharpness with that setting on my typical focusing distance and focal length. I take some images as low as f/5 when I need more light or a faster shutter (like for moving trains) and can live with less depth. The relation of aperture to depth-of-field is a very complex one (here’s a nice tutorial if you want to know more) but the bottom line is simple: use the smallest aperture (largest value of f-stop) you can make work. One caution: image quality usually degrades above f/13 or so (very dependent on camera model), so don’t use more than you need.
BTW, you’ll often hear about “pinhole cameras” as a way to take layout photography. This is essentially using a tiny aperture and depends on a long exposure to work. A true pinhole camera has no lens, and avoids some of the image quality issues lenses have with high f-stops.
Shutter Speed
Shutter speed freezes motion. A slow shutter can work if you use a tripod and photograph still models (and that’s a way to get lower ISO and/or more depth-of-field). Actually freezing a moving train requires very fast shutter speeds (likely 1/250 of a second). So all of my “action” photos are actually of parked trains. I often use shutter speeds as low as 1/30 or even 1/15 of a second, but for that you need a tripod or an image-stabilized camera.
Equipment
My equipment consists of a Canon EOS 40D DSLR equipped with a zoom lens of a range of 24-105mm. Since this camera uses a smaller than full-size sensor (“full frame” sensors are 24x36mm and found only on more expensive cameras) there’s a “crop factor” to adjust the real focal length of the lens to the equivalent on a full-frame camera (or an old film camera, which were full-frame by definition). For mine, that’s 1.6x, so this equates to a 38-168mm lens, meaning it goes from just slightly wide-angle (below 50) to more telephoto than I typically need. I’ve found that to be a good range.
While you can take pictures with anything (and a good photographer can work around the limits of a poor camera), I think ideally you’d want a camera that allows full-manual operation with a wide-to-mild-telephoto lens. A DSLR is even better, since they have better low-light performance (less noise under higher ISO) than a smaller point-and-shoot camera. Failing either of those, a camera that can be put in aperture priority mode (to let you select depth of field needed) and optionally shutter priority mode (to let you freeze vibration for hand-held shots) and which lets you set white balance to a specific number (rather than just “daylight” versus “tungsten”) would be a good choice.
The ability to capture RAW data (from the camera sensor) is very useful, but that’s mainly found on DSLRs and not smaller, less expensive, cameras. Having RAW gives you more post-processing options, like setting white balance long after you took a photo to fix problems you didn’t notice at the time, or working better in low-light conditions.
Note that this doesn’t have to be a digital camera. I think digital is more versatile, but you can take photos with film. Many places will process these and provide a CDROM of JPEGs you can load in a computer. There are some limits to that, but they are the same limits you’d have with a camera that only produces JPEGs.
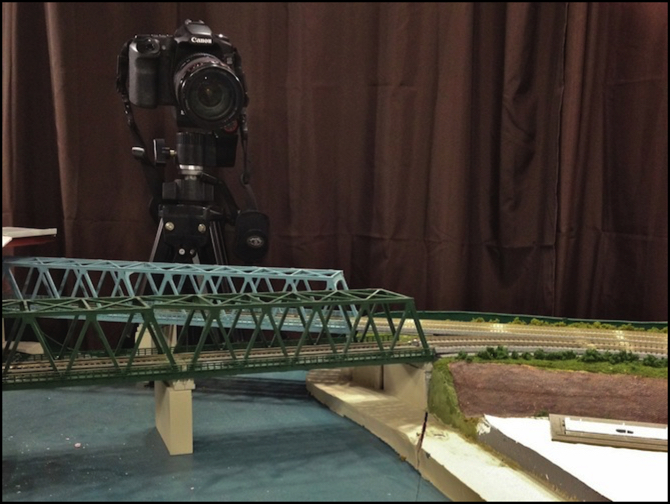
A tripod, or even several, is also important. I have a full-size one I can stand on the floor and extend well above layout height, as well as a couple of small ones I can stand on the table within the scenery as needed for close-ups.
Also, minimum focusing distance (MFD) is an important characteristic of a lens, or camera if the lens is built-in. I use a “macro” lens, meaning it was designed to enable close focusing. Mine will focus as close as 1.48’ (0.45m) although I don’t think I’ve ever taken full advantage of that. My usual focusing distance is around two feet (0.6m) or more. When buying a camera/lens for model railroad photography, be sure to find out what the MFD is (look online for manuals or reviews).
Finally, software that will let you post-process the image is necessary, but I’ll come to that another time.
Note: the photo at the top of the page was taken with an iPhone, and shows some of the limitations of that as a camera. The white tracing paper on the right (where the building foundation is located) was blown out (light level of 255) due to overexposure since it was exposing for the mostly-brown backdrop. And since it doesn’t provide RAW, there was no way to recover. It did get the color correct all on its own, however, but it underexposed slightly and I had to do some adjusting of highlights and shadows to get it to look its best.
The iPhone is pretty limited as a camera: the focal length and ISO are fixed and the zoom is digital, meaning it just throws away pixels when you “zoom in”. There are third-party apps that will let you customize the exposure and white balance processing (I don’t have one, so I can’t report on how well they work). It’s also fairly noisy even under the lighting on my layout, as seen in the full-size extracted image below.
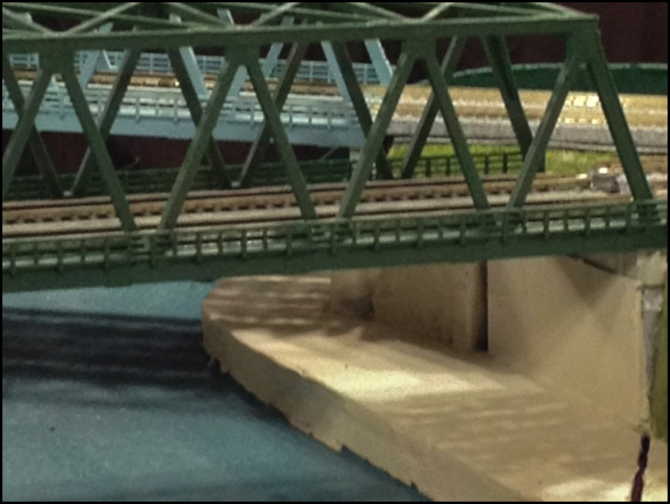
Noise: look closely, the white speckles are digital sensor noise.
Environment
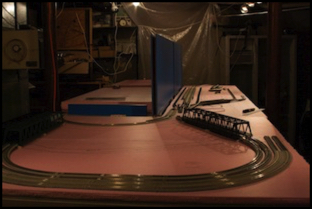
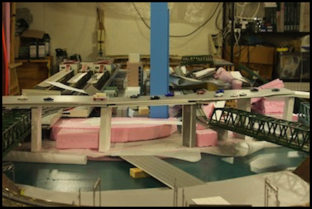
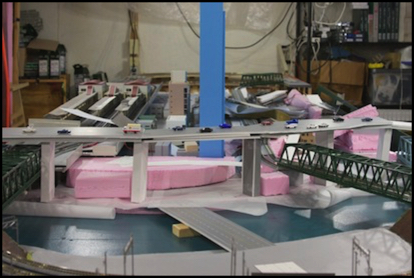
For a photo to look good, it needs to include just what you want to show. Mostly this is achieved by having a backdrop, and by taking fairly close-up photos. Because my layout has an odd shape, I end up doing a lot of photography along the layout or across the River Crossing scene. For those photos, I have a brown curtain to hide the rest of the basement, as seen above. The original was an old green sheet that was past its useful life, nailed to the ceiling beams. You can see that in some of my older photos. Now I have a better solution: shower curtains. These are a woven fabric that’s treated to be mildew-resistant (useful in a basement) using standard shower-curtain hooks to hang from a window curtain rod run along the beams (there’s one rod on each side of the River Crossing scene, and two curtains on each rod to provide full coverage from any angle. And as a plus, I can slide them out of the way when I need to access the storage shelves behind them.
I may add more in the future at the other end of the layout. The washing machine keeps making cameo appearances in my photos.
Vibration
If you hold a camera in your hands, it moves. With a fast enough shutter speed this doesn’t matter. The rule of thumb is that the shutter speed needs to be one over the focal length. So with a 50mm lens you could hand-hold a 1/50-second exposure, but not 1/40. If the camera does “image stabilization”, as some better cameras now do, you can use shutter speeds somewhat slower than that (and I do).
But for the most part, it’s best to use a tripod. And for really slow shutter speeds you can get a “cable release” (originally a mechanical cable, now typically electronic) to trigger the shutter with absolutely no chance of adding vibration from your hand. Some software packages (like the Aperture one I use) can remotely trigger the shutter via the USB cable (I’ve never actually used that, though).
Paradoxically, DSLRs are worse at vibration than point-and-shoot cameras, because they contain a mechanical mirror that snaps out of the way when the shutter is triggered, creating their own vibration source. You can get around that with “mirror lock up” or “live view” settings, that move the mirror out of the way before you trigger the shutter. And cheaper cameras won’t necessarily support cable releases or remote USB triggering, so DSLRs are still preferable.
Lighting
To start with, you can’t take good pictures without good light. More light means faster exposures (less blurring due to shake) at lower ISO (less noise) while retaining the needed depth of field. Now you could just use special photography lights set up while you take pictures or multiple flash heads (and post-processing to correct the color balance of those). That’s how most magazine photographs are lit. But that’s more work, so the obvious question is what you can do to avoid that, meaning how much light do you need for reasonable photography? It depends on the camera, with a modern DSLR being quite a bit better than most older ones, or the typical point-and-shoot camera.
Some people use fluorescent tubes in double-tube fixtures mounted above the track in a valence. While T12 are often used, those are being phased out of production, and T8 offer slightly more lumens, particularly as the bulbs age. With a dual-tube T8 fixture, you’d have about 1,300 lumens per foot of output. I’m using CFL (compact fluorescent) R20 floods with about 450 lumens each, one per foot of table. So I have only 35% of the light of an ideal setup. The fact that they’re floods offsets that a bit since what matters is lumens per square foot and the floods focus their light on the layout better.
I’m probably on a par with a layout using a single fluorescent tube fixture rather than a dual-tube one (but that’s a guess). On the whole, if I were doing it over I’d use tubes. But my system does work with my camera, and I’m not going to replace it anytime soon, so I’m going to describe my photography in that context.
The basement has two ceiling incandescent light fixtures. I never seriously considered using them, the but top-left photo (#1) below shows what a layout lit by them would have looked like. Using a camera’s built-in flash doesn’t really work either (#2, top, right) as it is too bright close-in, too dim further out, and creates harsh shadows if used alone.
Good lighting requires a more uniform solution. My old layout had used track-lighting fixtures, and these were fine for seeing the layout with the naked eye, but were too dim (#3, lower, left) for photography because there was only about one fixture every two feet. After a bit of work, I settled on new compact-fluourescent lights in the track lighting, and with about twice as many lights per linear foot (#4, bottom right). You can see that’s more evenly illuminated, but now it has the somewhat greenish cast you can get with fluorescent lights, and that takes us to color.
#1: Room lit with original incandescent bulbs (left) and #2: with on-camera flash (right)
#3: Room lit with old track lighting (left) and #4: new track lighting (right)
Color Temperature and Color Cast
I’d hoped, when creating the layout lighting, to end up with something where my camera would actually get the color right automatically. In technical terms, that means auto-sensing the “color temperature” of the scene and setting the correct “white balance” and producing a JPEG image from the sensor data based on that. When white balance is wrong, the image will be the wrong colors or have a color-tint to it. But that’s not the whole picture, as different light sources can impart a “color cast” to the light, separate from the temperature aspect.
Color temperature refers to the temperature the body producing the light would needed to be heated to (for an ideal “black body”) to emit that light. It’s measured in Kelvins, or absolute temperature. Direct sunlight is around 5500K, with overcast days tending more to blue at 6000K or more. Most “daylight” bulbs are too blue for my taste as a result.
The solution (for me) turns out to be using a neutral gray reference and adjusting white balance manually (and shooting in RAW mode, so it’s not a solution for everyone). Well, actually I use Aperture (the software package from Apple, named confusingly for the aperture setting in photography), so I just need to click on the gray reference and it does all the work. And by a striking coincidence (yeah, right) the gray foam-core I’m using for bridges is a pretty good gray reference. If I didn’t have that, I’d have to shoot two images, one with a gray card in them, and one without, and then adjust the white balance of the second to that the software determines from the reference in the first. I’ve done that a few times. Or you can just guess and try different numbers until it “looks right”. I’ve taken enough layout photos now that I’m getting pretty good at that kind of guesswork.
You can also get the same result if your camera will let you set a manual white balance before you take the photo, although then you need to experiment to find out what it should be and you can’t change it later if you set it wrong. With “cool white” fluorescents, 4100K should be about right, but not always. Image #4 above was auto-set to 4108K and the “correct” image below required 3581K because I’d left the incandescent ceiling light on and that shifted the average lower (I also had to remove the green color-cast, but that too is automatic with my software).
Color-adjusted image, (#4 above with WB of 3581K and tint adjustment)
White Balance Setting and Color Correction
As noted above, using RAW is best, with manual setting to a numeric white balance second, but what if you can’t do that?
Cameras that are more automatic will often have a knob or menu item to set the white balance/color temperature, although they may not call it by those names. This will usually have options like “Auto”, “Daylight”, “Tungsten”, “Fluorescent”, etc. The daylight setting is normal daylight (5000K - 5500K), while Tungsten is for incandescent lights (around 3000K - 3500K) and fluorescent is, as the name says, for those (and specifically usually best with “cool white” fluorescents, around 4000K - 4100K).
The “Fluorescent” setting may also help remove the green tints you tend to get with fluorescents. Otherwise, there may be a “color correction” adjustment that can deal with color casts. If not, you’d need to fit an appropriate color-correction filter externally to the lens. Color correction needed for fluorescent lighting will be to remove green (called “minus green”), which is sometimes described as adding magenta. See the manual for you camera to figure out what it can do.
Frankly this is all much easier to deal with in post-processing, and that’s the best argument for a camera that can do RAW.
Summary
And that in a nutshell is how I take my photos: light the layout so I can use good values of ISO/aperture/shutter, set up the camera on a stable tripod to enable use of slower shutter speeds, select f-stop for depth of field and adjust other settings to get good exposure, and select (compose) what I want to photograph, zooming in to remove extraneous stuff from the photograph. And if I weren’t doing it in post-processing, select the appropriate color balance and color correction.
There are some other things you can do when using presets (like “aperture priority”) rather than full manual (primarily exposure compensation to override the choices the camera software makes if it’s over- or under-exposing), but since I take photos in full manual mode, I don’t have any experience with those.
Next time I’ll talk about what I do when that all goes wrong, or when I decide I want a slightly different picture than I took, but don’t want to go back and set up the photograph again.