


A Clean Track is a Happy Track and February 2013 Monthly Status

Track gets dirty. Cleaning track is a nuisance. But if you want trains to run reliably, it’s an essential nuisance.
My layout is in an unfinished basement, with lots of boxes and other junk that collect a fine layer of dust, not to mention exposed joists with insulation, and power tools that kick up their own dust from cutting wood. A drop ceiling, drywall, and tile floor around the layout would be nice. But it’s not very practical in this basement. Maybe in a future basement...
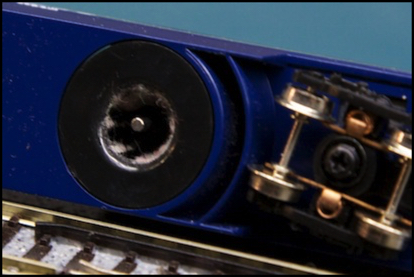
So I clean. Often. The above photo shows the inside of the dust filter on my vacuum car, holding the dust that accumulated on one 30’ length of track in about two weeks since the last time I ran a train. It’s not a lot, but it’s enough to gum up the gears of a drivetrain. And here’s a photo of the inlet of the vacuum itself, with the dust that didn’t even make it inside to be trapped:
So cleaning is important. And I’m lazy. Before I had scenery, cleaning was done with a shop-vac. Aside from a tendency to try to eat the Unitrack, this worked well; there’s not much in the way of dust that resists a shop-vac. But that’s not very practical once there are structures and scenic material on the layout.
So I needed something a bit more refined. What I do has evolved since I started the layout. Here’s how I approach it today.
First, I’m using Unitrack, which is not only high-quality rail that doesn’t corrode easily, it’s highly polished, which means there’s less for dirt to “grip” on the rail. That makes removing the dirt easier. Now to keep that, I don’t use abrasive cleaners (“Bright Boy” or similar). Those will put fine gouges in the rail tops, which give dirt something to grab onto. You need those if you let the track get corroded, so lesson 1 is: don’t let the track get corroded.
An important tool for that is a dehumidifier. I have one that’s up on a shelf, so it can drain into the washing-machine drain, and I don’t have to remember to empty the catch basin on it. It’s set to keep the room humidity at 40%. In the winter it runs infrequently, only when the outside temperature gets above freezing, and then not for long. In warmer weather it rarely stops running, but it mostly keeps the humidity below 50%, and that’s good enough. My first one burned out after 5-8 years of operation. I expect this one will too. But they’re not that expensive, and I can afford a new one every few years. It helps that the basement’s concrete walls were sealed with paint by the previous occupant.
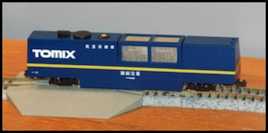
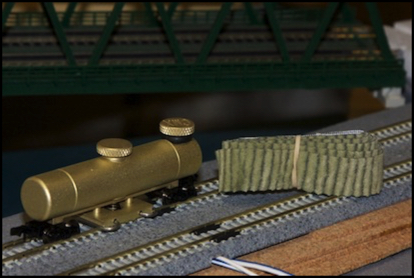
Next is the vacuum cleaner car noted above. This is a Tomix car, actually I have two of them:
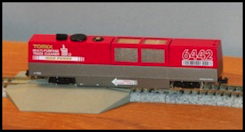
The default configuration is as a vacuum, but they also have a small tank and can be equipped with a soft pad and filled with cleaner. I’ve only used these as vacuums, since I didn’t want to be bothered with buying replacement supplies from Japan for the cleaner and pads. And yes, I could probably have made my own and used some other cleaning solution, although I’m dubious about putting alcohol in a plastic body next to an electric motor, there are just too many ways that could go wrong. I could also likely use the supplies for the Atlas version on mine, they certainly look identical. But that’s one of those things I didn’t think about, probably because I wasn’t all that excited by the idea of using it as a wet cleaner (see “alcohol and electric motor” above). I mainly wanted them as vacuums, and as vacuums they work excellently.
I need to convert one of these to DCC to clean the parts of the layout that don’t support DC trains. And that must be done carefully, as exposure to DCC voltage will burn out the motors VERY quickly. But for now I’ve been running them on DC, pushed around the layout by one of my locomotives.
After vacuuming, my next step has been to clean the rail using pads soaked in isopropyl alcohol (sold in drug stores as “rubbing alcohol”). The problem with this is that simple cotton pads will lose fibers without any provocation (even the ones that look fiber-free). And with sectional track that effect is more pronounced, as the ends of the track will tear fibers loose. And fibers are even worse than dust for gumming up drive gears on trains. I ended up removing obvious fibers by hand, then running the vacuum around to catch the unobvious ones. It wasn’t really a great method. I probably could have used small pads cut from handi-wipes, but for some reason I never thought of that until I no longer needed them. For several years I used the “cotton pad an alcohol” method, and while it worked, it was a lot more effort (mostly in the cleanup of the fibers) than I wanted to be doing.
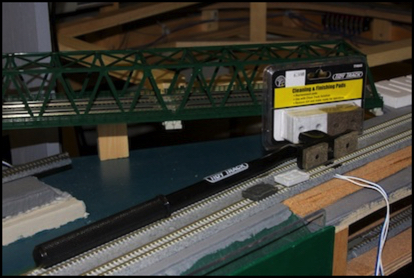
Last fall, I discovered the new Woodland Scenics Rail Tracker cleaning system. This includes an extendable arm that holds pads on one end, allowing you to reach inside bridges and short tunnels. And you can angle it enough to work around Kato’s catenary arms (it would be more of a problem if I had catenary wire strung over the tracks, but I don’t).
This comes with dark “rescue pads” (which I don’t use since they’re clearly abrasive pads), lighter gray “maintenance pads” (which I also don’t use, as I suspect they’re abrasive also) and softer felt-like cleaning (brown) and finishing (white) pads. So far I’ve only used the brown pads, which seem to work pretty well. While they supply their own cleaner, I’m not sure it’s any better than simple alcohol. But it seems to do a fairly good job of keeping mostly clean track clean.
This is a good track cleaner, and I’ll probably continue to use it for extra-dirty track or other problem areas.
But this doesn’t meet my laziness standards. It’s okay if I have been neglecting the layout, and need to give it a serious clean. I’d tackle it with this first, then run the vacuum car around. But I want something I can run in a train if the layout is clean, and just needs a light touch. That way I can clean all of the track, without a whole lot of work. I’d originally planned to use the Tomix cars for this, but like I noted I had reservations about that. And after reading a number of recommendations, I picked up a CMX Clean Machine at a train show recently. I haven’t used it yet, but I have high hopes for it.
This is a solidly-made car of heavy brass, with a sprung plate underneath to which you attach the fabric pads (what they supply is just a length of heavily-textured cloth you cut to length, and they note you can buy your own in a fabric store). When I asked the dealer, the recommended cleaner was 95% isopropyl alcohol (a bit stronger than the 70% stuff I have been using). The one problem with that is that even the 70% stuff will strip paint, and the 95% kind might be very bad for in-street track or grade crossings.
However, there’s a review of the CMX that suggests using an even stronger cleaner. I’m not sure that’s necessary, but I’m no chemist. The instructions that came with mine suggested “strong” cleaners once to start and then annually, and “weak” cleaners (including alcohol) the rest of the time, so perhaps over time enough plastic and other stuff from wheels will end up on the rail to require the strong cleaners. But I will agree with the reviewer on one point: using cleaners that just deposit fluid on the rails without scrubbing, and worse using fluids that add their own contaminants to the track, just seems like a pointless waste of time to me. Too many “cleaning fluids” leave an oily film on the track, that’s just going to attract dirt. How does that make sense?
The CMX isn’t cheap. List is US$139, and everyone seems to sell it at list (there was a show discount when I bought mine, but I had to pay state tax so it ended up about the same). What you’re getting is a hefty object, that’s going to have the weight to actually scrub the pad along the rails, rather than just lightly polishing them. I think that’s an advantage over the Tomix cars.
While you can get it from a number of places, Tony’s Train Exchange seems to have the best documentation on it, and shares a street address with CMX (I’m sure that’s just a coincidence). I bought mine from their booth at a local train show. I bought my DCC Specialties RRampMeter from them a number of years ago too (and oddly, DCC Specialties has the same street address as the other two; sheer coincidence, I’m sure).
I don’t have any relationship with any of those companies (except as a customer), and I don’t normally give recommendations. But I have to say that’s one company (or three) that I’m happy to give my business to.
My car came with a knuckle coupler on one end, and a Rapido on the other, so it will work with either kind of engine. My usual “junk” engine for things like this has a knuckle coupler, and the Tomix cars have Rapido’s, so I can make up a train with the vacuum (which has Rapido’s) on the front, the CMX car, and then the engine pushing it. I haven’t done that yet, but it’s my current plan of action.
And in particular, this will make it a LOT easier to clean my underground subway tracks. I really wasn’t looking forward to periodically removing the “roof” to get in there with cotton pads.
Monthly Status
February went by quite quickly. Aside from a small bit of work on the “unsceniced” end, trying to work out how I’m going to put scenery above the future helix, it went to work on my evaluations of wire-in DCC decoders. That’s still in progress, but it’s making good headway, and I’m hopeful that I’ll be done in March.
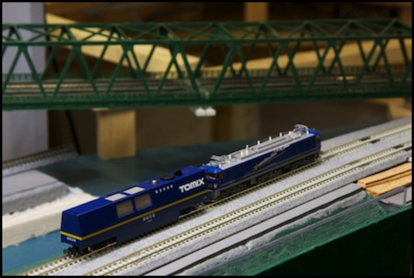
I’ve also installed a couple of Kato decoders along the way, and will do more. My two newest trains arrived the other day, a pair of Kato Marunouchi six-car subway sets. The Marunouchi, like my earlier Ginza line subway train, is a 600V third-rail line, dating from before Japan effectively standardized on overhead 1500 volt systems for both subway and surface trains.
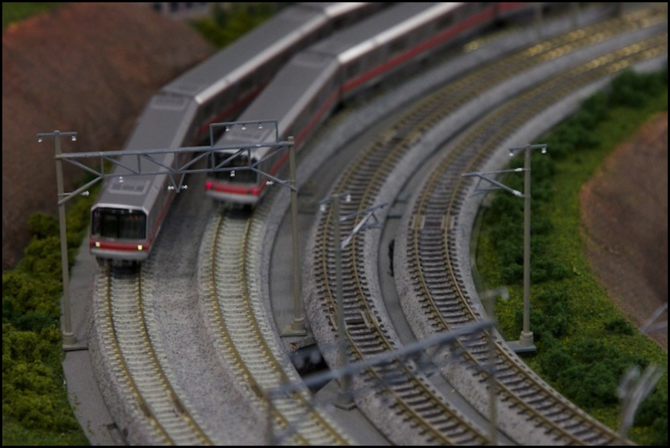
Marunouchi Trains in Operation