Tomix JR E1 MAX Toki
21 May 2013 01:22 Filed in: Model Trains,Review
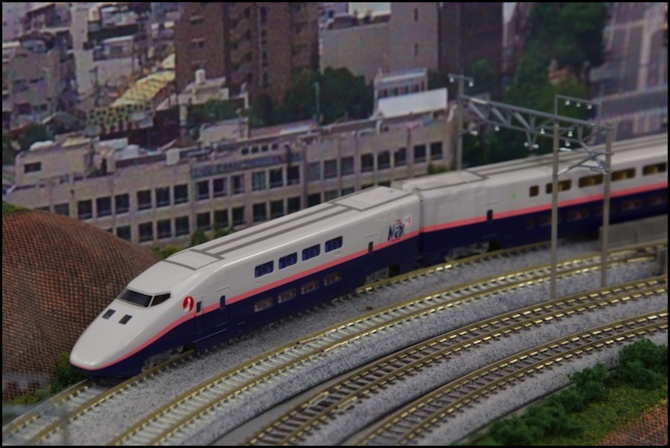
My latest model, which actually arrived back in March, is this Tomix model of JR East’s E1 “MAX” Shinkansen. Trains of this series operated on the Jōetsu Shinkansen line, north-west from Tokyo to Niigata, from 1994 until 2012 when they were replaced by the E4 series. Both the E1 and E4 were branded as the MAX (for Multi-Amenity eXpress).
Note: larger versions of these photos can be found in the Roster Album, the Train Photos Album and the Car Detail Photos Album.
This train was designed (per Japanese wikipedia) to fill a need for increased capacity on this line, driven in part by commuters. Thus there was an emphasis on capacity over speed, with the double-decker design capable of holding 1,235 passengers in standard and green (first) class. A total of six trains were built, identified as sets M1 to M6.
This model is of the version that operated the limited-stops Toki service after 2003 (up until it was replaced by the E4 in 2012), identified by the color, and pink stripe. The name Toki comes from the Crested Ibis, an endangered species native to Niigata. The E1 was also used in the all-stops Tanigawa service. Both trains had a top speed of 240 kph (150 mph), with 410 kW motors on all 24 trucks, for a total of 9.84 MW (13,196 hp). However, this model specifically reflects the M6 set as decorated with a Crested Ibis logo after August 28, 2012 for one month, until the E1 was withdrawn on 28 September, making it a rather time-specific version of the E1.
The twelve car model is about 192 cm in length (75.75”) and just fits my Shinkansen platform, which is composed of seven 248 mm seconds, plus one of the long ends from Kato’s 23-109 set.
This is my first Tomix Shinkansen, so I’ve been looking forward to it since I first preordered it, many months ago. It also fills a gap, in that I didn’t have an E1 model, and had wanted one for some time. It’s one of the last Shinkansen to use a sloped nose (which I generally prefer stylistically) rather than the “duck bill” design required to reduce “tunnel boom” on higher speed trains (tunnel boom is a sonic-boom like noise created by a high-speed train exiting a very narrow tunnel pushing a pressure wave in front of it; it’s a serious form of noise pollution in Japan’s more built-up regions).
Two things make this model stand out from my usual EMU models: First, Tomix uses an all-cars electrical pickup system, where the couplers link each car together, which makes it much less prone to erratic running due to dirty or uneven track as there are always some wheels making good contact out of the 48 axles on the train.
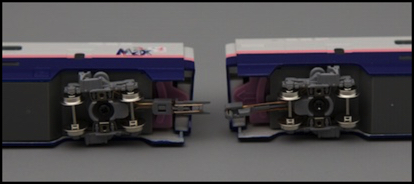
Electrical connections
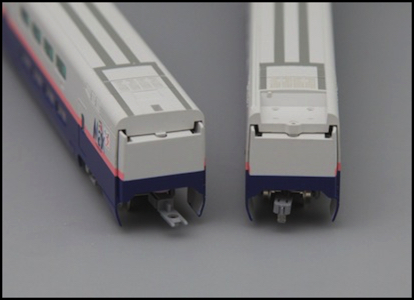
Coupler detail
Second, the train has two motor cars. Considering that some of my 10+5 sets have motors in both sets this isn’t the first train I’ve had with multiple motors, but it is my first single train (as opposed to two coupled trains that can in theory be run separately) as well as my first Shinkansen model with two motors. Since it’s going to be used on my outer (Express) loop, which can be DC-powered, I don’t need to worry about converting it to DCC, although I probably will eventually.
The train has molded interior detail, and can be equipped with interior lights using the standard Tomix / MicroAce style of lights. It comes with a set of decals to be applied for a number of external signs (including car numbers), apparently to allow two slightly different versions to be lettered, but as there was only one Crested Ibis train, it’s not clear why this option is given (it may be a holdover from the original E1 model). There are also several plastic insulators to be attached to the roofs.
However, a number of exterior decals are painted on, including the MAX Ibis logo (see photo further down) and the green cherry blossom leaves identifying the first-class cars. There is also a decal on the cab site, which is different for the two ends:
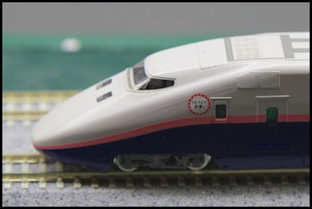
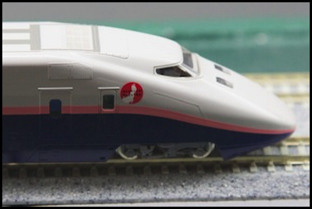
The model has plastic diaphragms between the cars (see photo of couplers above) that fit flush against each other on straight track. On curves these open slightly as seen below.
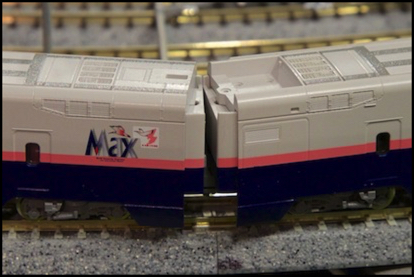
The train is rated to operate on 280 mm radius (11”) curves, although the instructions warn of a need to have straight tracks between such curves and both single-track bridges and platforms. On my track, admittedly with rather generous 414mm curves, the train ran smoothly with no binding. It also ran happily through the stretch of track where I appear to have some kind of electrical problem that affects my other trains. This is where the all-car pickup really shows its advantage.
That said, there are some downsides. The couplers use a vertical pin-in-hole method, which requires lowering one car onto the other to couple them. The problem is that this doesn’t cause the pin to fully engage (due to the springy electrical contacts). It might work that way and eventually lock in, or it might decouple unexpectedly. You could perhaps hold the cars in place and lift the lower bar up onto the upper one with a very small screwdriver or similar tool.
My approach was to rail the first car (the one with the drawbar having the hole), lower the second car in place and rail it, then holding it down lift the first car off the tracks at that end until the pin fully engaged, then rerail it. Not a fast operation.
I’m also not a fan of the pantographs. There are two cars with panto’s on the model, plus a third that has the depressed area (photo above) but without a pantograph, which is apparently intentional per the instruction sheet, which only shows two (and the wikipedia page concurs). But the panto is a very cheap-looking plastic model, not up to the Kato’s standard for plastic panto’s than I’m used to, and which didn’t want to stand up, and kept folding forward or backwards.
In the plus column, the model runs very well and very quiet. At one foot (30 cm) I could, just barely, hear the whine of the motor over the hiss of the wheels rolling along the track at speed, but any further away and it went unheard. The headlight and taillights both were quite bright, but not unreasonably so.
At low throttle I could make it crawl at 248 mm per 10 seconds, a scale 14 kph or 9 mph. At a throttle of 12V (Kato USA pack turned to the end of the green band) the train ran smoothly, making a complete loop of my outer track in 18 seconds, for a scale speed of 273 kph or 169 mph, well above the prototype’s 240 kph. And even at lower speeds, it did not slow visibly going up the four-foot-long 2% grade on my Riverside Station scene.
It looks very good in motion.
Summary
Overall, I like the model. It runs beautifully and the level of detail, while not extreme is quite good. It does however require applying very small decals to finish it (not something I’m in favor of doing as my eye/hand skills aren’t that great). Finished, with a lit interior and some figures, I expect this to be a fine-looking model. It’s pretty darn good straight out of the box.
Unfortunately it’s going to be one I’m reluctant to take out of the box due to the level of effort required to get the cars coupled. This is a model that will be great to own if/when I have a yard that can store a seven-foot-long train. Until then, it’s likely to spend most of its time on the shelf.


