


Detailing A Viaduct Station I
21 April 2014 23:01 Filed in: Structures,Scenery
After a fairly long break, I’m working on a model railroad again. I’ve returned to work on the One Point Five Meter Line, my compact (1’ x 5’, or 30 cm x 150 cm) light-rail line layout for displaying my structure models. See that page for the track plan. See my Display Layout link for other musings about this layout. See my Urban Station page for a detailed construction log for this building.
The first order of business is to get the track down, but to do that, I need to install the station at the “urban” end of the layout that supports the track on a Viaduct. This is a Kato Viaduct Station Entrance building with one of the associated “shops” buildings, supporting two lengths of Viaduct Platform 248 mm (9 3/4”) each in length. While you can buy a large set for this (23-125) it has parts I don’t need, so instead I’m using two smaller sets (set 23-230, the Viaduct Station Entrance, and set 23-231, the Viaduct Station Shops).
These are pre-assembled structures, but I want to detail them, which includes adding lighting, interior details Kato omitted, and paint. I also need to modify them so I can run wires through them up to the track, as well as to the underside of the viaduct they support.
The track wiring will include track power, the station signals, one of my IR emitter/sensor sets (see the Tram Controller pages for info on the layout’s control system), and some LED lighting on the platform. The viaduct wiring will go to lights mounted on the outside of the station buildings, and to LEDs underneath the viaduct where is crosses a road. In all, I’m planning three separate cable runs through the buildings.
For two of these runs I’m creating elevator shafts inside the building using 3/8” (9.5 mm) square plastic tube from Plastruct. This is ABS rather than normal styrene, but it’s not under stress and my usual Testor’s model cement holds in it place just fine.
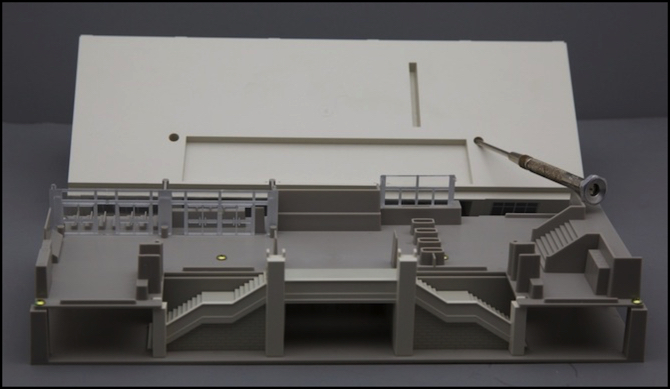
When I detail a model, the first question I ask myself is: how is a real structure like this used, and what is missing from this model. Kato has thoughtfully provided stairs up to the platform at the far right, above which I’ll place some kind of platform stairway. What’s missing is an elevator up to the platform, so I’ll need to add one to the right of the turnstiles molded into the upper level shown above. And a separate elevator is needed to the left of the turnstiles going down to the ground. I’m also putting an elevator in the “shops” building, but it won’t be obvious.
Kato’s provided ticket counters and a waiting room, to which I’ll add people and signage. I also need to place advertisements on the walls, and include some ticketing machines (the big center wall on the back looks right for those), and perhaps some freestanding vending machines for snacks and drinks (a staple of nearly any Japanese structure with lots of pedestrian traffic). I’ll probably think up a few more things as I work; I rarely plan every detail in advance.
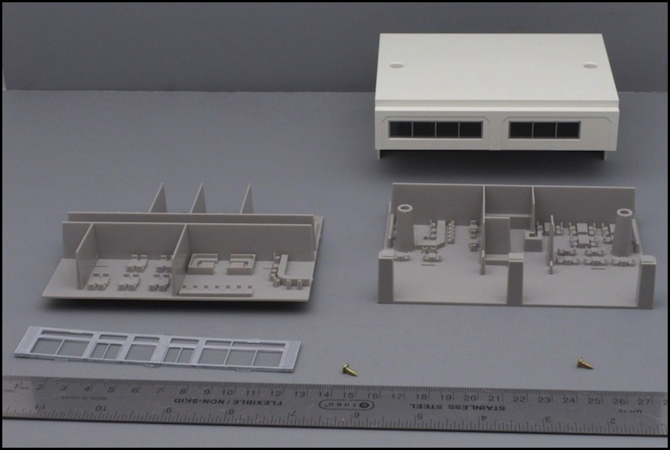
There’s also the “shops” building, which has molded detail on both a ground level and above at the front, although the windows are small enough that the upper level will be hard to see. These will get paint, people, and signs, plus some lighting. And maybe some more vending machines, or bicycle parking, outside the front.
So far I’ve made a plan, taken the buildings apart, cleaned them to remove dirt and molding chemicals (they’ll get cleaned again before I paint), drilled holes for the wire runs and glued in the elevator shafts and lighting valences (to hide the interior LEDs from outside view.
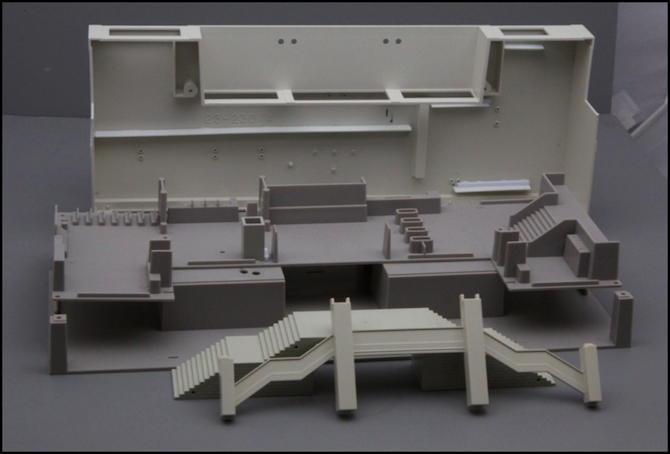
Entrance building with wire-run elevator shaft (left of entrance) and lighting valences (top)
Presently I’m doing my primer, interior base coat and exterior painting outdoors with spray cans, so I’ve had to wait for the warm weather to get to work on this. But I’m now nearly at the point where I can paint, and after that I’ll brush-paint things like molded benches, and then adding lighting, signs, and people will follow.