


Bike Shop
24 May 2012 21:59 Filed in: Model,Structures
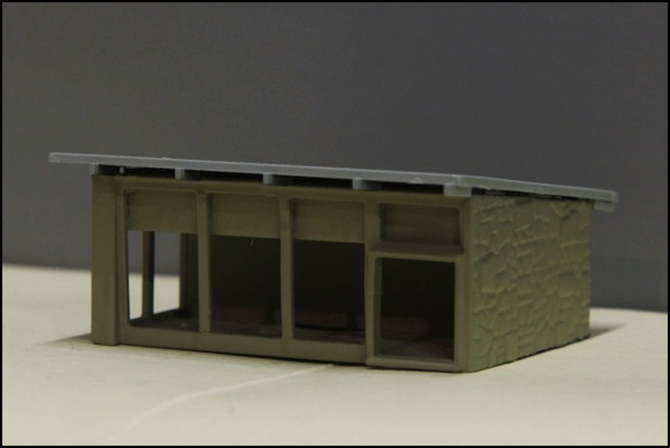
It’s been a while since I started working on the buildings of the “village” section of the River Crossing scene, and progress has been slow, but not non-existent. I’ve built and painted the interiors for the two Kato apartment buildings (well, most of them, I’ve one left to finish) and have been working on collecting images to glue into them. I’ve also started work on what will likely become a bicycle shop, starting with a Bachmann Plasticville Drive-in Hamburger Stand (#45709). That’s it up above as it stands today, after initial painting.
I’d originally wanted to make this a scooter shop, based on a photo of one I’d seen (see the Buildings Etc page in the Reference Images section). But N-scale scooters proved hard to find (I do have a couple) and bicycles are much more common (I have piles of them planned for decorating sidewalks near stations), so I think it’s going to be a bike shop, unless I change my mind again.
This is a fairly good model for a cheap (US$15, but I’ve seen it as low as $9) pre-built structure. It comes with the building attached to a parking lot base with two poor-quality cars and a rather odd planter. The building and base even includes a large hole, as if they’d planned for lighting to be installed. I removed the base early on, and don’t even have a photo of it that shows the details, although you can find them online easily enough. The rough stone wall is a bit odd for Japan, but I’m detailing it as if it were concrete cast to look like stone, which seems to be a better fit.
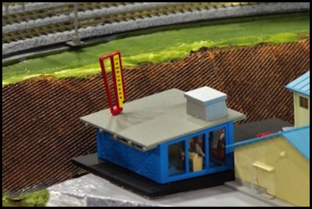
The “before” picture
The building comes with a tall signboard and air-handling unit for the roof, a counter inside, and two really poor figures on opposite sides of the counter. The “customer” has no paint except for hair and pants (both black) and the “clerk” isn’t much better. And that’s not an assembly error; I’ve seen a second one in a store that’s identically painted. They’ll be replaced, but the counter with its cast-on cash register will work, with a bit of paint.
But first, I needed to fix the “one big empty room” look, and prepare the model for painting. The parts are glued together, but it looks like the glue was applied after painting, so for the most part they come apart with a moderate amount of pressure. The only problem was the windows, which are thin sheet plastic that shattered easily (and some of it wouldn’t come unglued no matter what I did, which complicated things a bit. But I got it all apart, and then added some strip styrene and a couple of doors from detail supplier Tichy: a five-panel masonry door (2504) for the outside, and a four-panel wood door (2513) on the inside. While I was working on it, I decided the roof didn’t need a big sign, and plugged that hole with filler. I also filed down some mold marks and flash, and I’ll need to repaint the air handler as a result.
While removing the windows I broke one of the thin front bars between the windows, as well as the strip above them, but they glued back together easily.
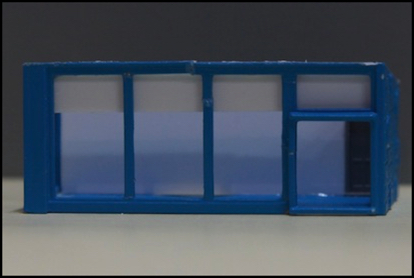
With interior, and repaired window framing
I also added a valence inside the front and side window (side one not yet installed in the photo below). The valence serves three purposes: it hides the top of the inside wall, so I could use styrene a bit shorter than the roof, and avoid having to build a transom over the inside door. It also provides a signboard for the store name on the front, and it acts as a lightblock, so I can put a 2” strip of LED Lights on the ceiling, pointed down at the front of the shop.
The valence is offset from the front, to leave space either to glue a photographed sign onto it, or so I can make the windows full-height (but I may just end them at its base; you won’t be able to tell from a distance).
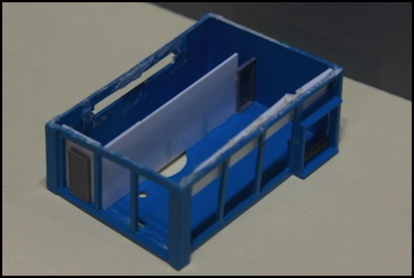
With back room divider and two doors
The holes on the floor inside will largely be out of sight, but may get covered up by a floor made from a photograph. Photographs will also be used to decorate the back wall. The rear window assembly (without “glass”) and the front door (which I left the “glass” on since I didn’t need to paint it) will be reinstalled when I’m done. The big hole will be used (in the back room) to bring up wires for the interior lighting.
After all this work was done, I painted the building on all surfaces (except the underside) and roof with two coats of flat black paint, followed by a coat of white primer. The roof top was then painted in a light gray, and the building was painted in a “concrete” color. I’ll brush-paint the window frames silver, and probably brush paint the back room’s divider in black so there’s nothing to see through the rear window I may paint the interior walls/floor in a light color in case any isn’t covered with photos, but I haven’t gotten to that stage yet (I need to wait at least two days for the spray paint to cure, before doing further painting, and I’ll probably wait longer.
But fairly soon this and at least one of the Kato apartments will join the electric substation as finished buildings in the village (which still lacks streets and sidewalks, another project I need to move forward), and maybe then I’ll get the gas station finished too. Things are moving slowly, although at least part of that is my tendency to do a little, then pause and think about the next steps for several weeks until I’m sure of what I want to do, while working on other things. But progress is being made.